

type
Post
status
Published
date
Nov 27, 2022
slug
linux-nps
summary
tags
开发
建站
linux
category
技术分享
icon
password
Property
Dec 23, 2024 08:36 AM
URL
这个是在 linux 上安装 nps
1. 安装
这是 GitHub项目地址
nps
ehang-io • Updated Aug 25, 2023
到 https://github.com/ehang-io/nps/releases 下载相应的版本,我的服务器是 64 位系统,x86 架构的,所以我下载 linux_amd64_server.tar.gz 这个,用 wget 命令获取
然后解压
最后安装
2. 服务端配置
安装好之后需要修改一下配置文件,因为默认启动 nps 是占用 80 端口的,大多数情况下我们会搭建 nginx 服务,而 nginx 服务会占用 80 端口,这样会无法运行,所以我们需要修改配置
下面这个是原始配置
看起来有点长,说里面比较关键的几个东西
#HTTP(S) proxy port, no startup if empty
http_proxy_ip=0.0.0.0
http_proxy_port=80 这里的 80 修改成其他端口
https_proxy_port=443 443也最好修改成其他端口
https_just_proxy=true
#web
web_host=a.o.com
web_username=admin 这个是 web 页面的用户名
web_password=123 这个是 web 页面的 密码
web_port = 8080 这个是 web 页面的口
web_ip=0.0.0.0
web_base_url=
web_open_ssl=false
web_cert_file=conf/server.pem
web_key_file=conf/server.key
更详细的配置说明
名称 | 含义 |
web_port | web管理端口 |
web_password | web界面管理密码 |
web_username | web界面管理账号 |
web_base_url | web管理主路径,用于将web管理置于代理子路径后面 |
bridge_port | 服务端客户端通信端口 |
https_proxy_port | 域名代理https代理监听端口 |
http_proxy_port | 域名代理http代理监听端口 |
auth_key | web api密钥 |
bridge_type | 客户端与服务端连接方式kcp或tcp |
public_vkey | 客户端以配置文件模式启动时的密钥,设置为空表示关闭客户端配置文件连接模式 |
ip_limit | 是否限制ip访问,true或false或忽略 |
flow_store_interval | 服务端流量数据持久化间隔,单位分钟,忽略表示不持久化 |
log_level | 日志输出级别 |
auth_crypt_key | 获取服务端authKey时的aes加密密钥,16位 |
p2p_ip | 服务端Ip,使用p2p模式必填 |
p2p_port | p2p模式开启的udp端口 |
pprof_ip | debug pprof 服务端ip |
pprof_port | debug pprof 端口 |
disconnect_timeout | 客户端连接超时,单位 5s,默认值 60,即 300s = 5mins |
将以上几个红色部分修改就能启动了,
最后使用
ip:8080 就能访问 web 页面了,账号密码就是上面的点击
客户端-新增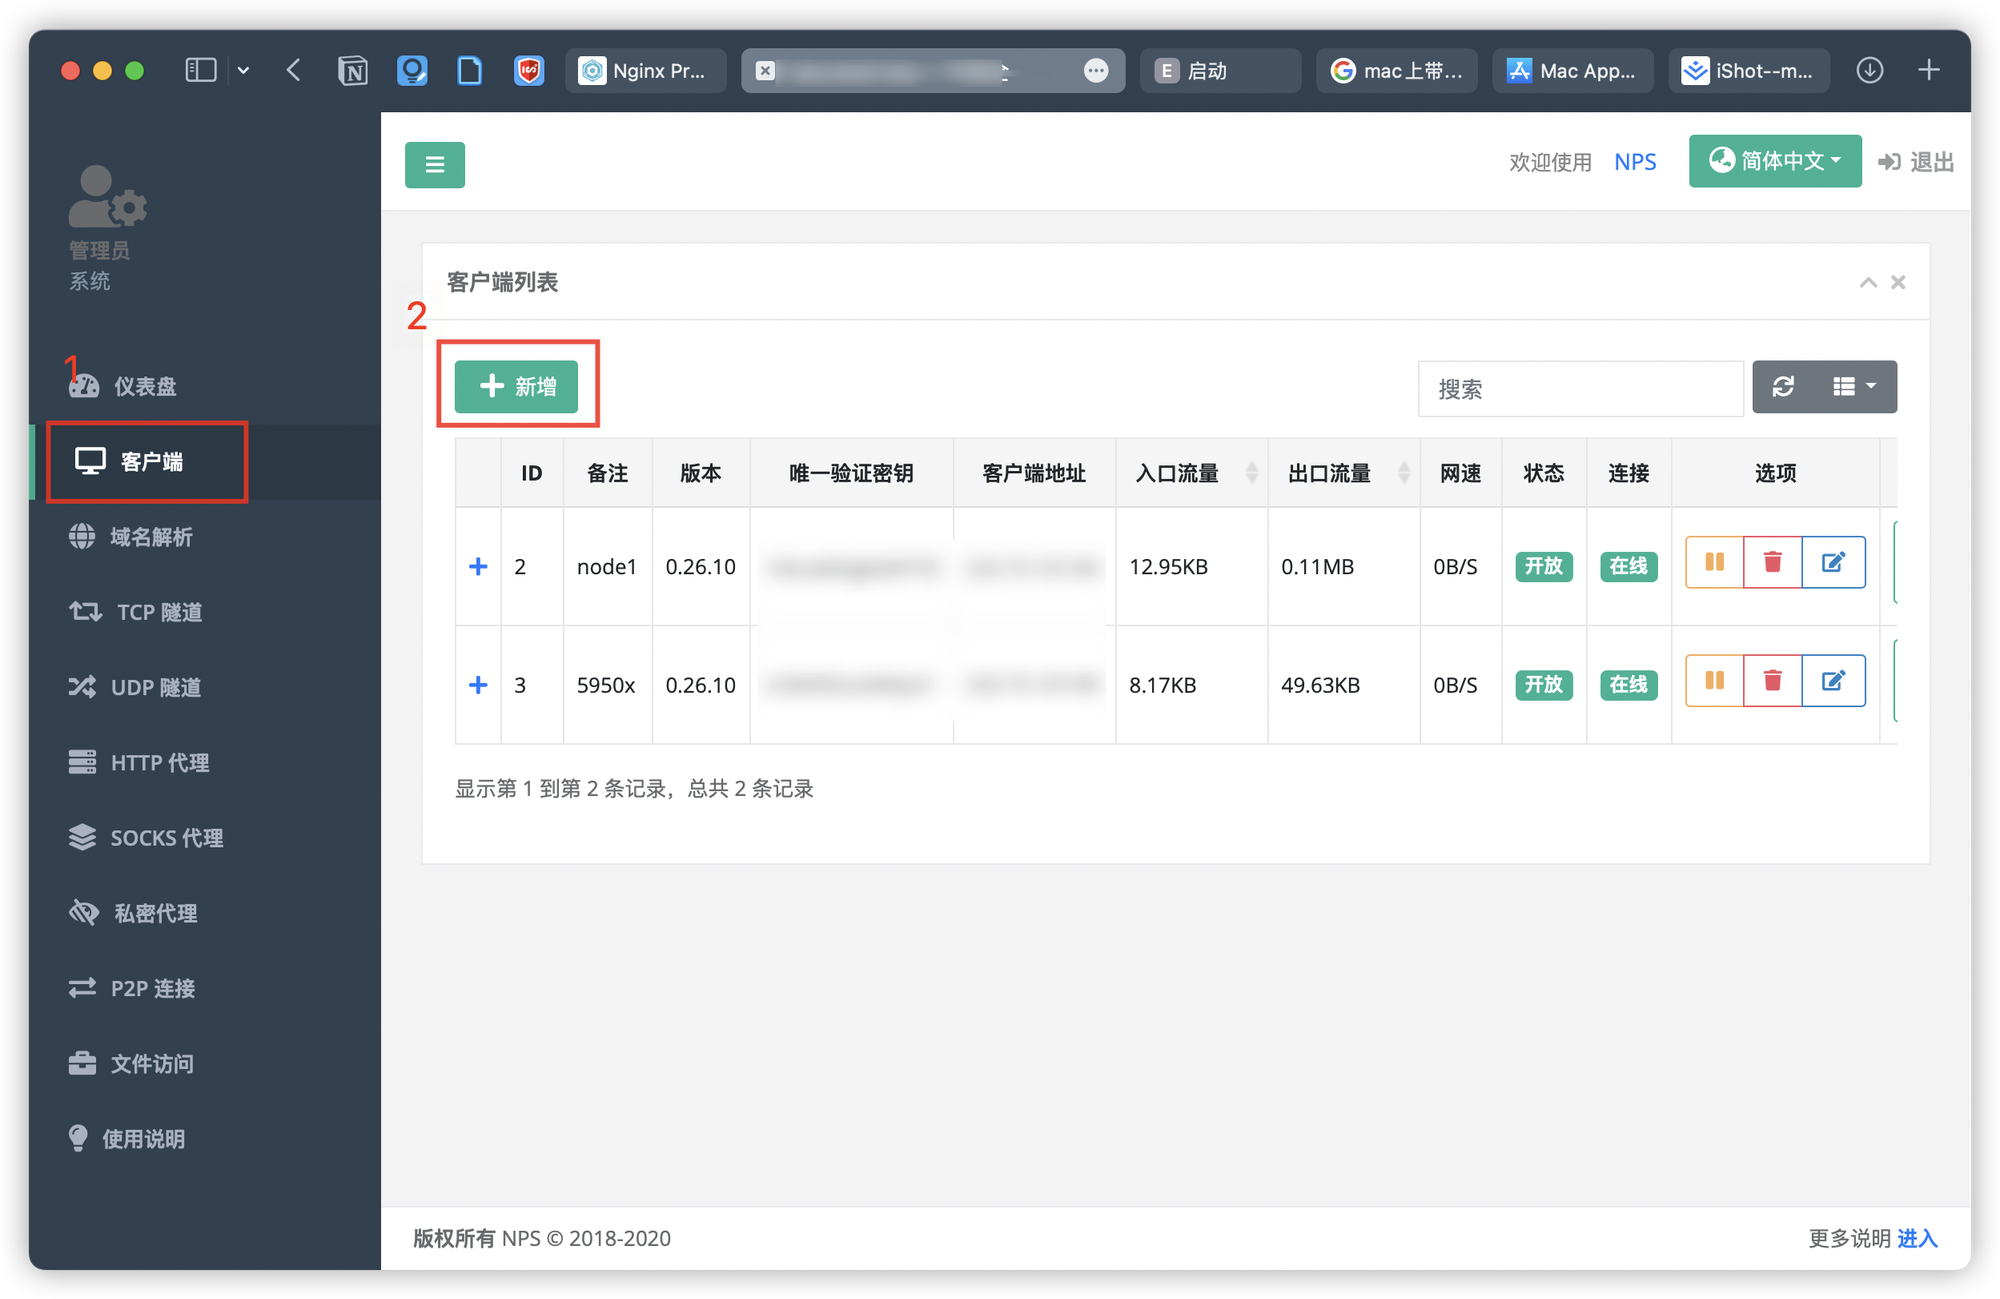

会给你一个客户端命令
但是我们后面用的时候需要做一些修改
linux 客户端
win 客户端
此外如果你修改了配置文件,可以重新启动
3. 客户端配置
我的客户端是 x86 架构 cpu,64 位系统,所以我下载 linux_amd64_client.tar.gz ,在客户端上面新建立一个 npc 文件夹,然后下载客户端
最后我们使用 无配置文件 方式
启动
如果需要重新配置什么的,就用
最后再重复上面的命令就行了
4. 一些问题
修改了用户名和密码但是没有生效
nps install后默认的配置文件在etc/nps下面的nps.conf 如果你修改了以前下载位置的配置文件当然不生效,请确认文件是否是正在加载的配置文件 如果不生效 在提BUG
5. 参考文章
- 作者:我心永恒
- 链接:https://wxyhgk.com/article/linux-nps
- 声明:本文采用 CC BY-NC-SA 4.0 许可协议,转载请注明出处。


