type
status
date
slug
summary
tags
category
icon
password
Property
Aug 25, 2023 05:15 PM
URL
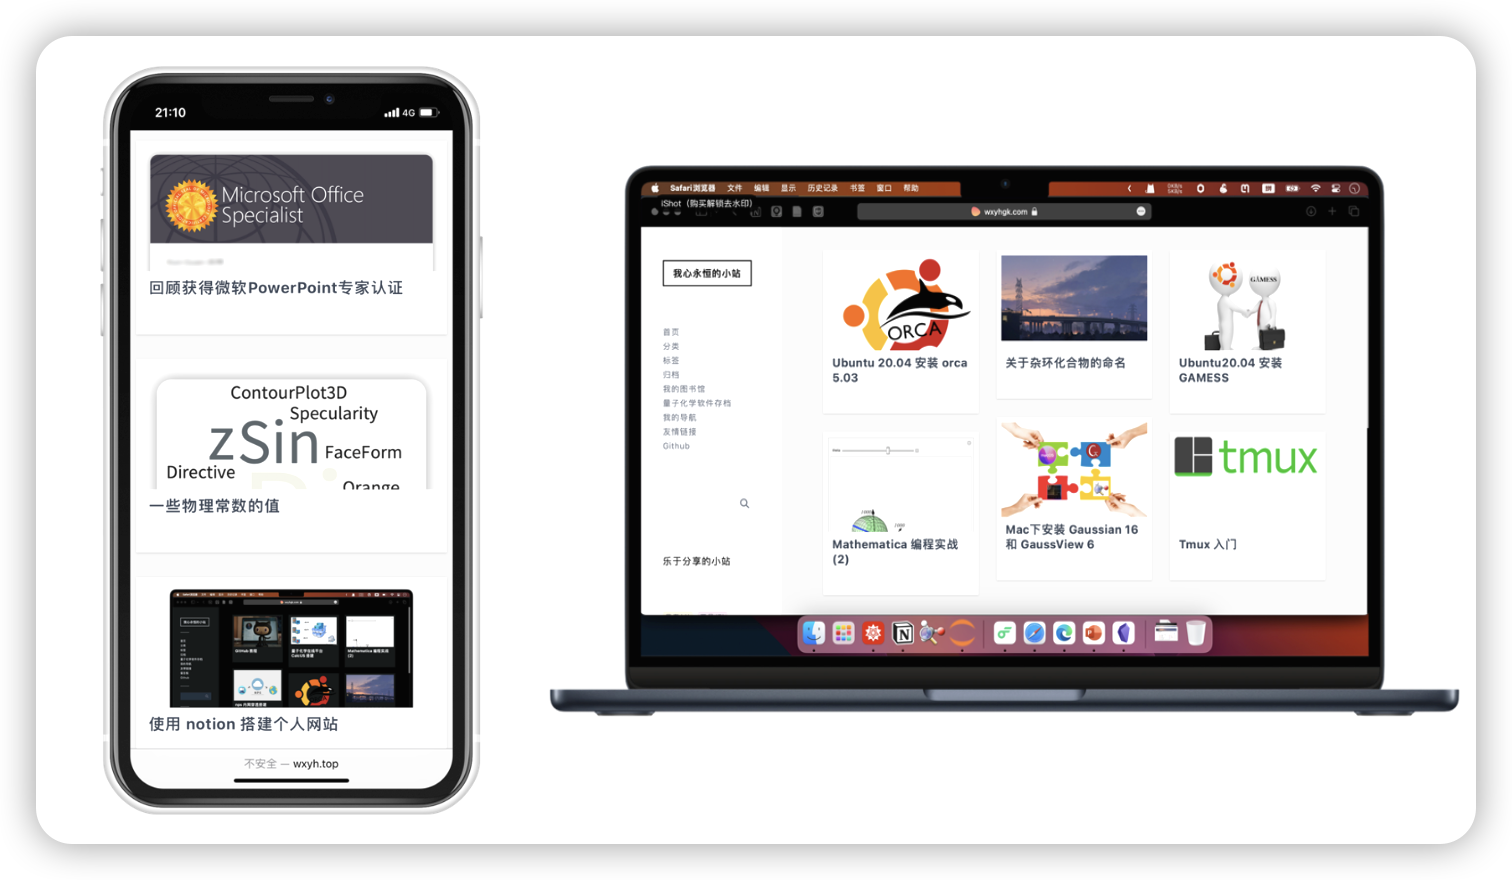
最终效果图
1. 准备工作
- 注册 Notion 账号
- 注册 GitHub 账号
- 注册 Vercel 账号
2. GitHub 设置
去 GitHub 项目 Fock 一份项目
NotionNext
tangly1024 • Updated Aug 24, 2023

3. Vercel 设置
去这里(点我打开)
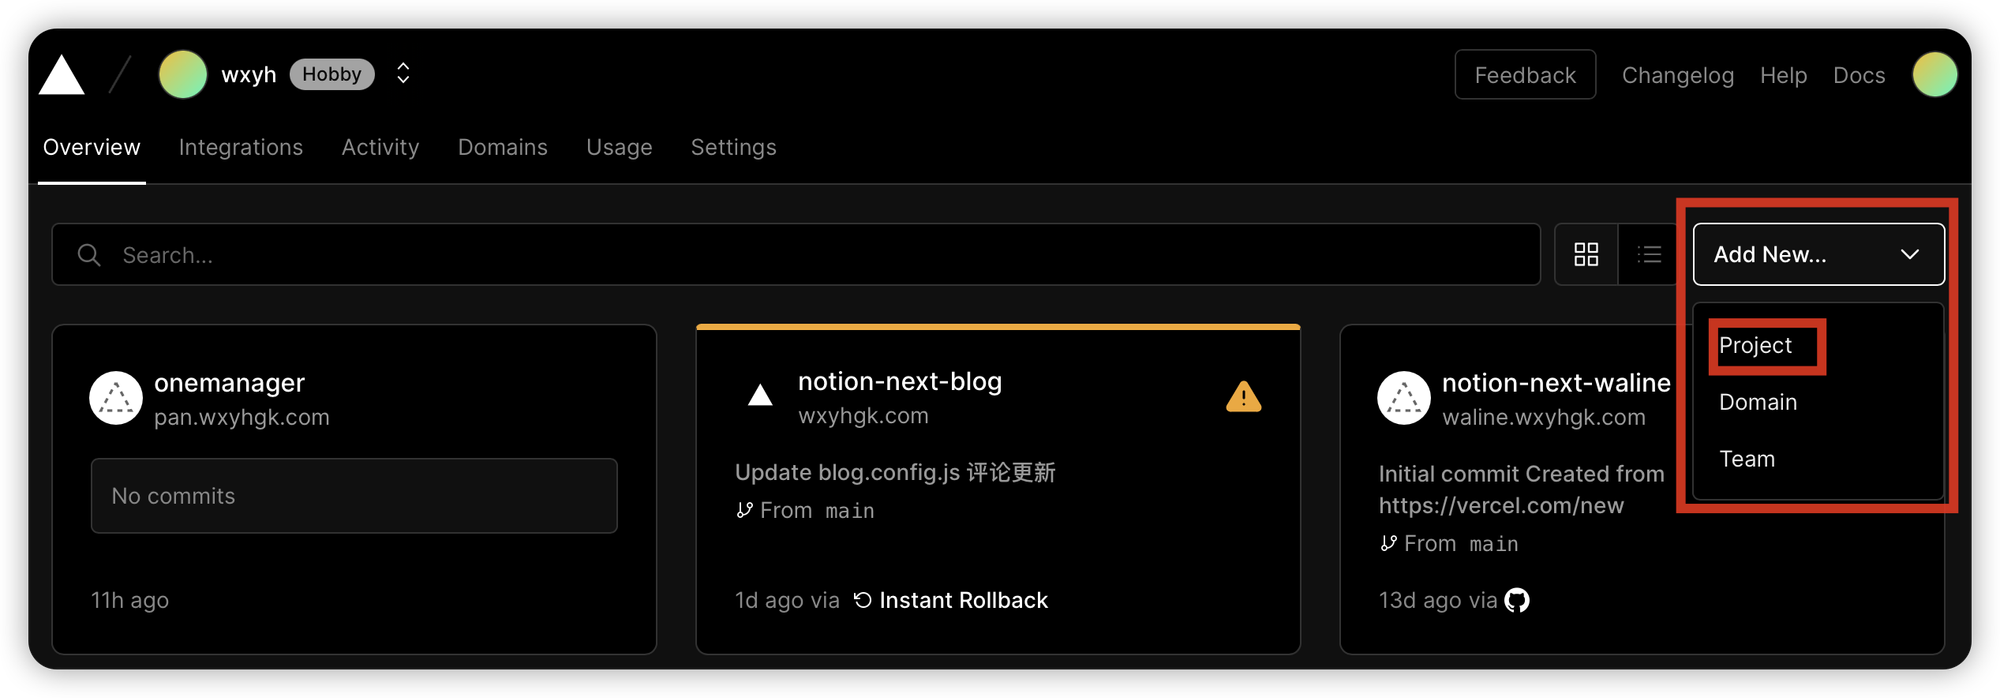
Add New → Project
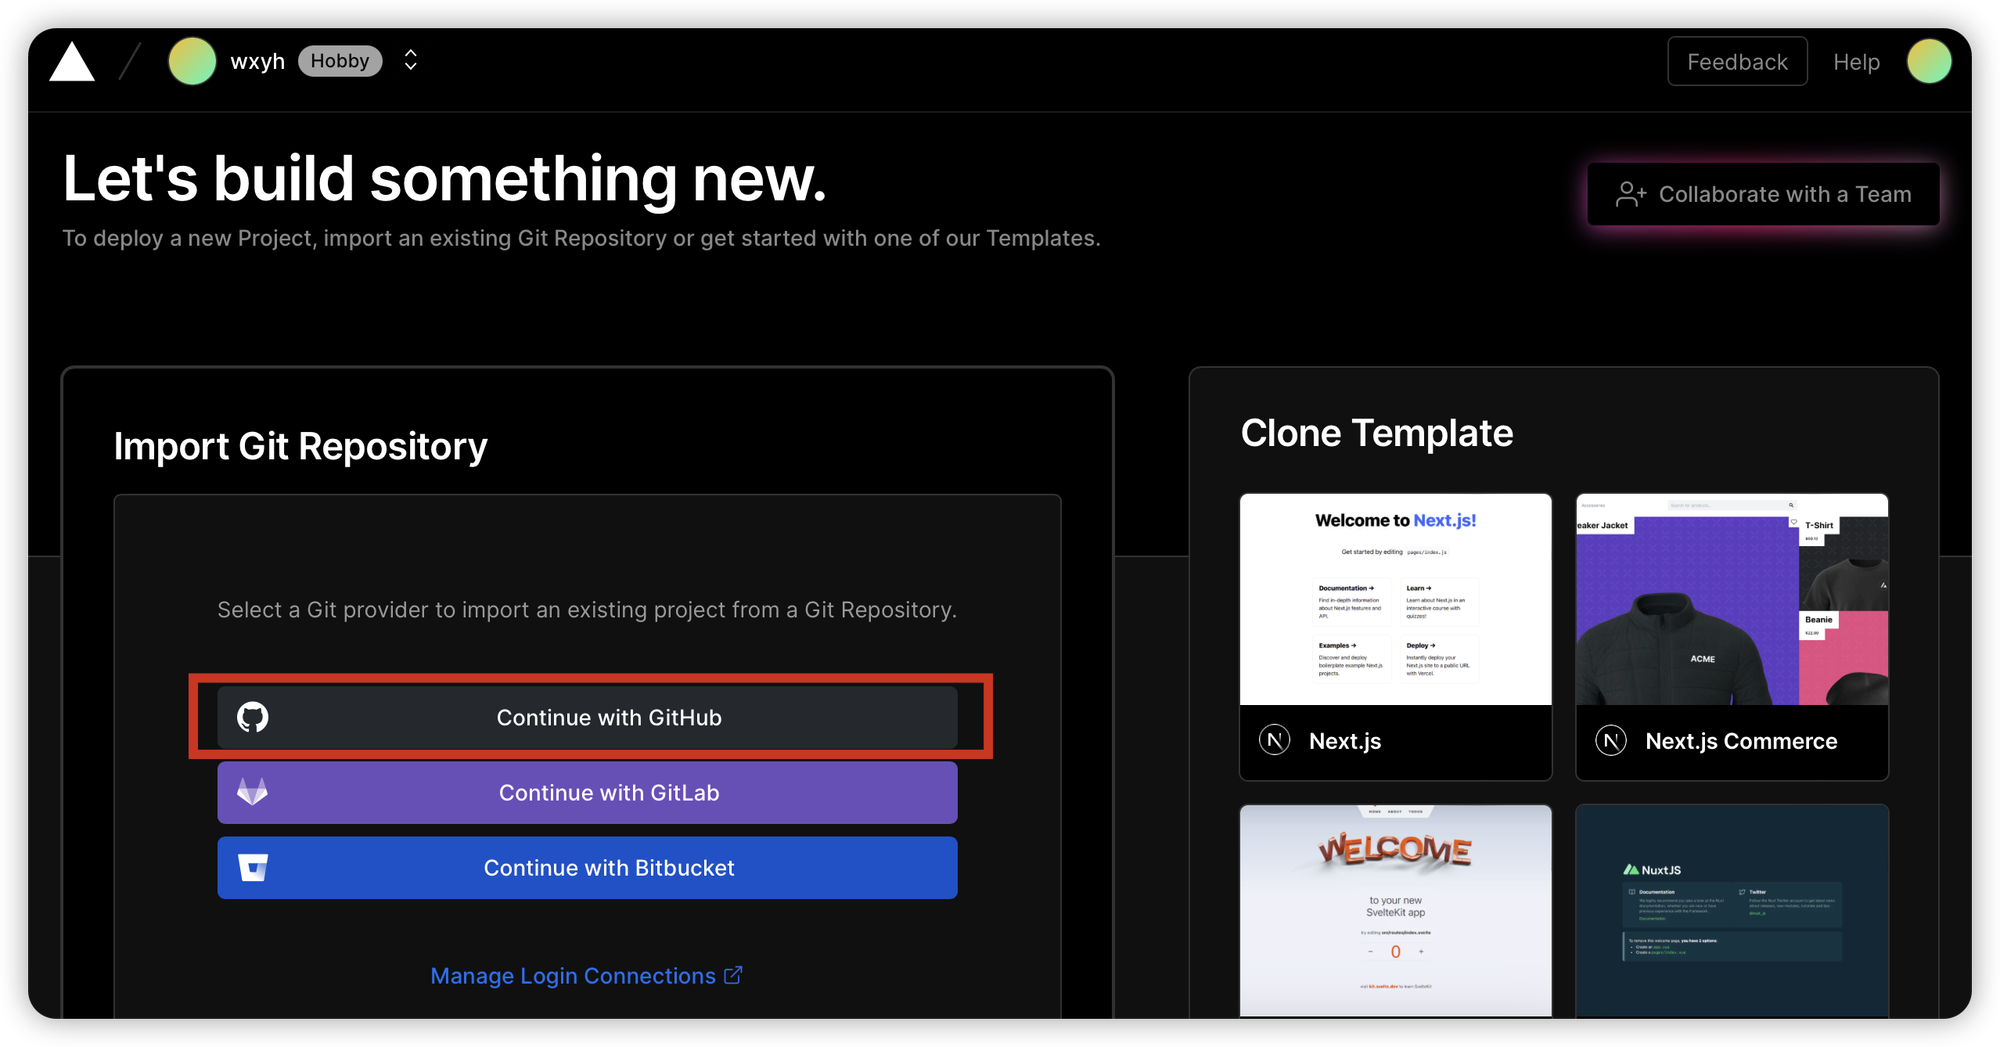
Continue with GitHub
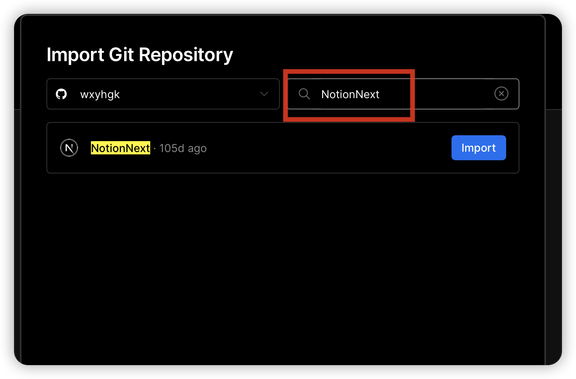
导入 NotionNext 项目
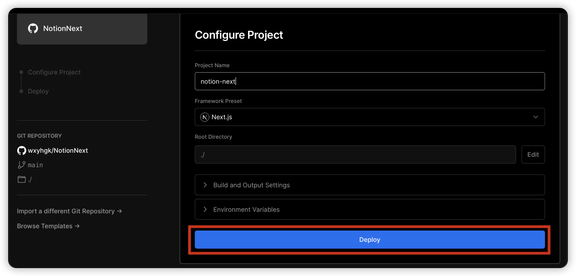
导入后就会开始自动部署,稍微等待一下就能部署完成了.
部署完,点击下面的链接就能打开了.
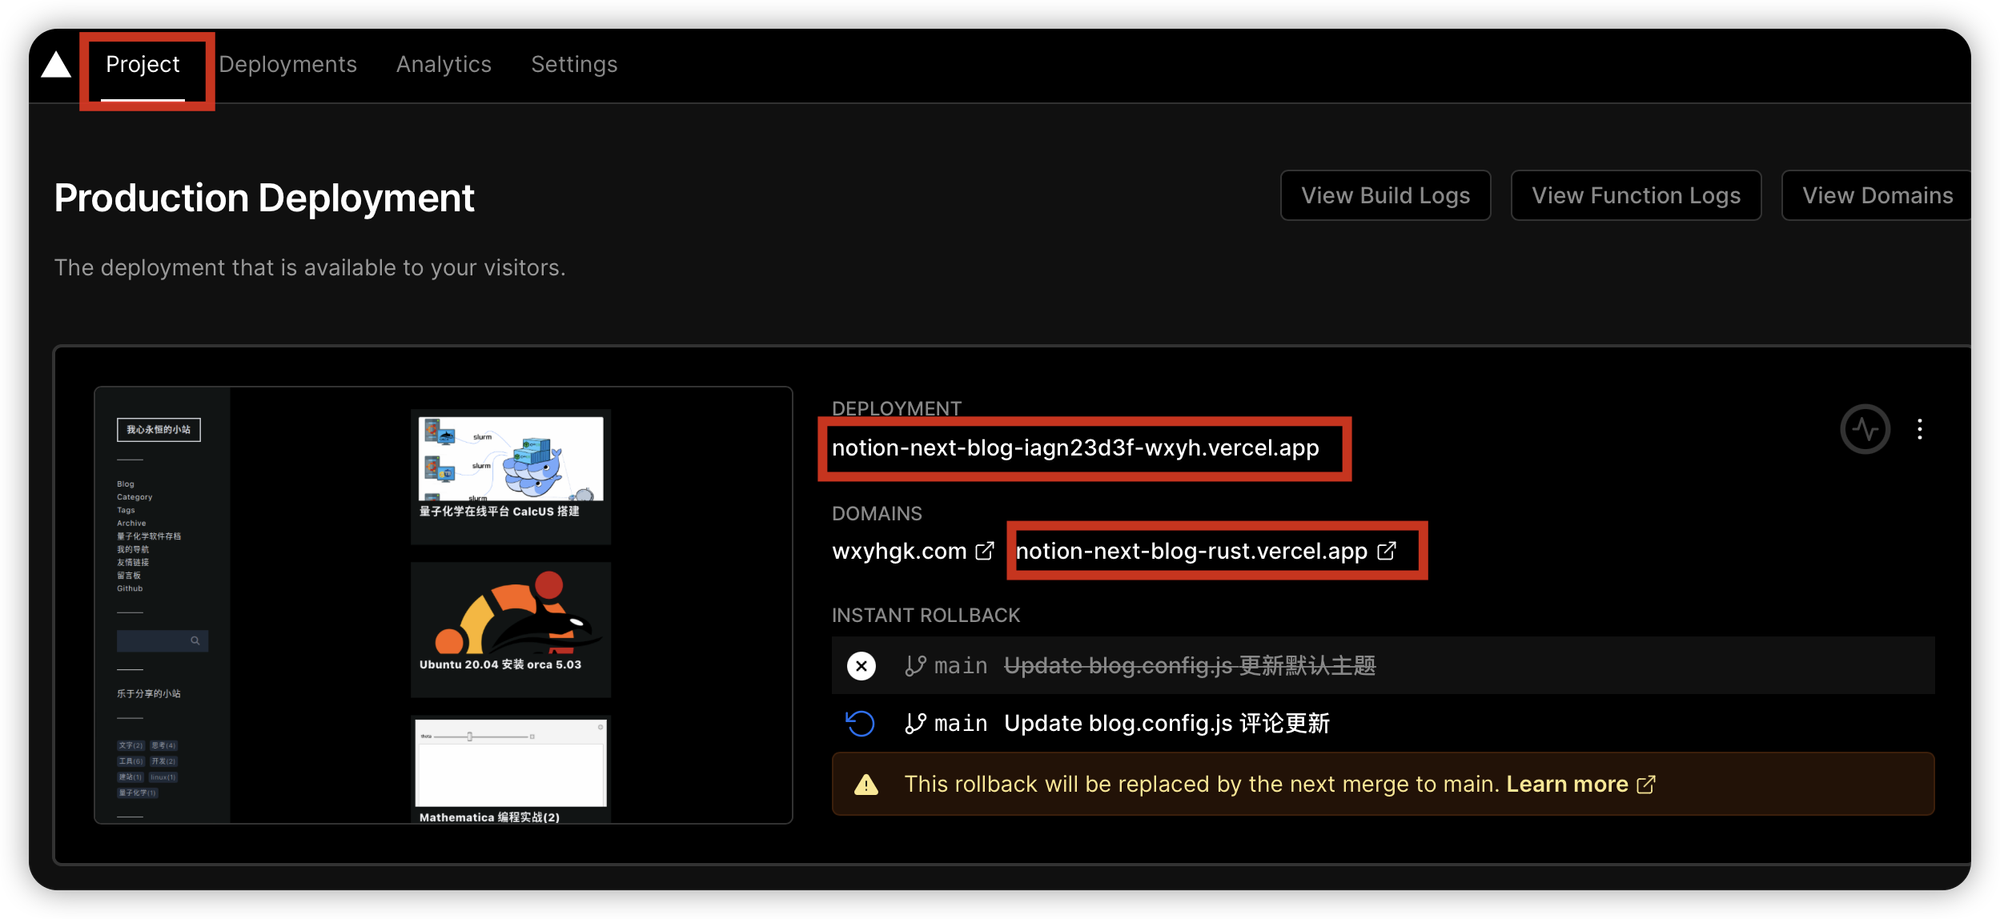
4. 博客设置
尽管上面的部署部署好了,但是这个用的是原作者的测试 Notion 页面, 不是你自己
4.1 导入 Notion 页面
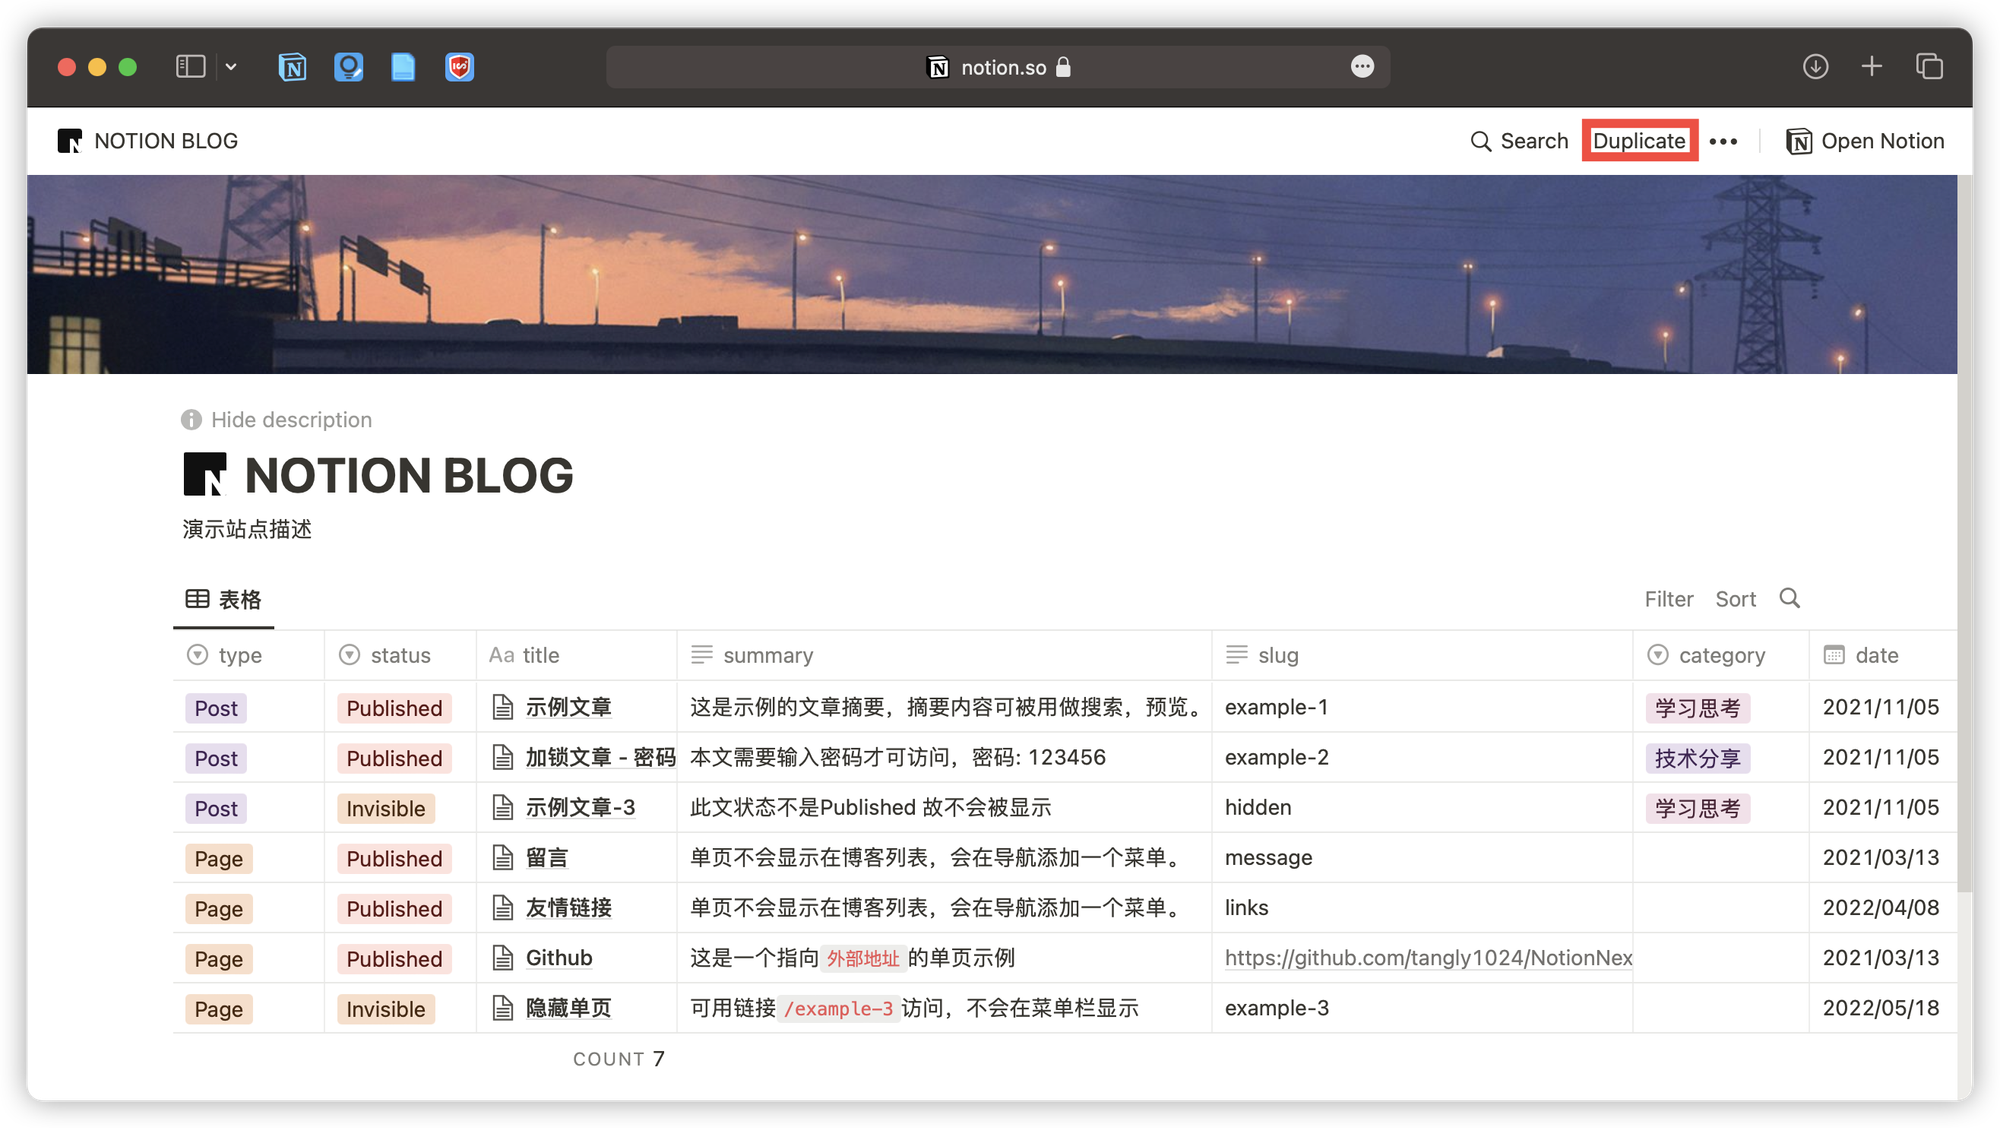
到这里( 点我打开 ),点击 Duplicate 这个按钮,然后就能放入到自己的 Notion 空间了.
4.2 分享 Notion 页面
导入刚刚的 Notion 页面之后,点击右上角的 share 按钮,

点击 Copy web link ,你会得到类似于下面的链接
https://wxyhgk.notion.site/9c1111d4b0faa762972b2b9a7a3?v=51fcd639c08943429974e228d093d560
复制上面的 红色部分 然后记住,这个是
PAGE_ID4.3 GitHub 项目设置
去到你 Fock 后的项目,然后修改
blog.config.js 文件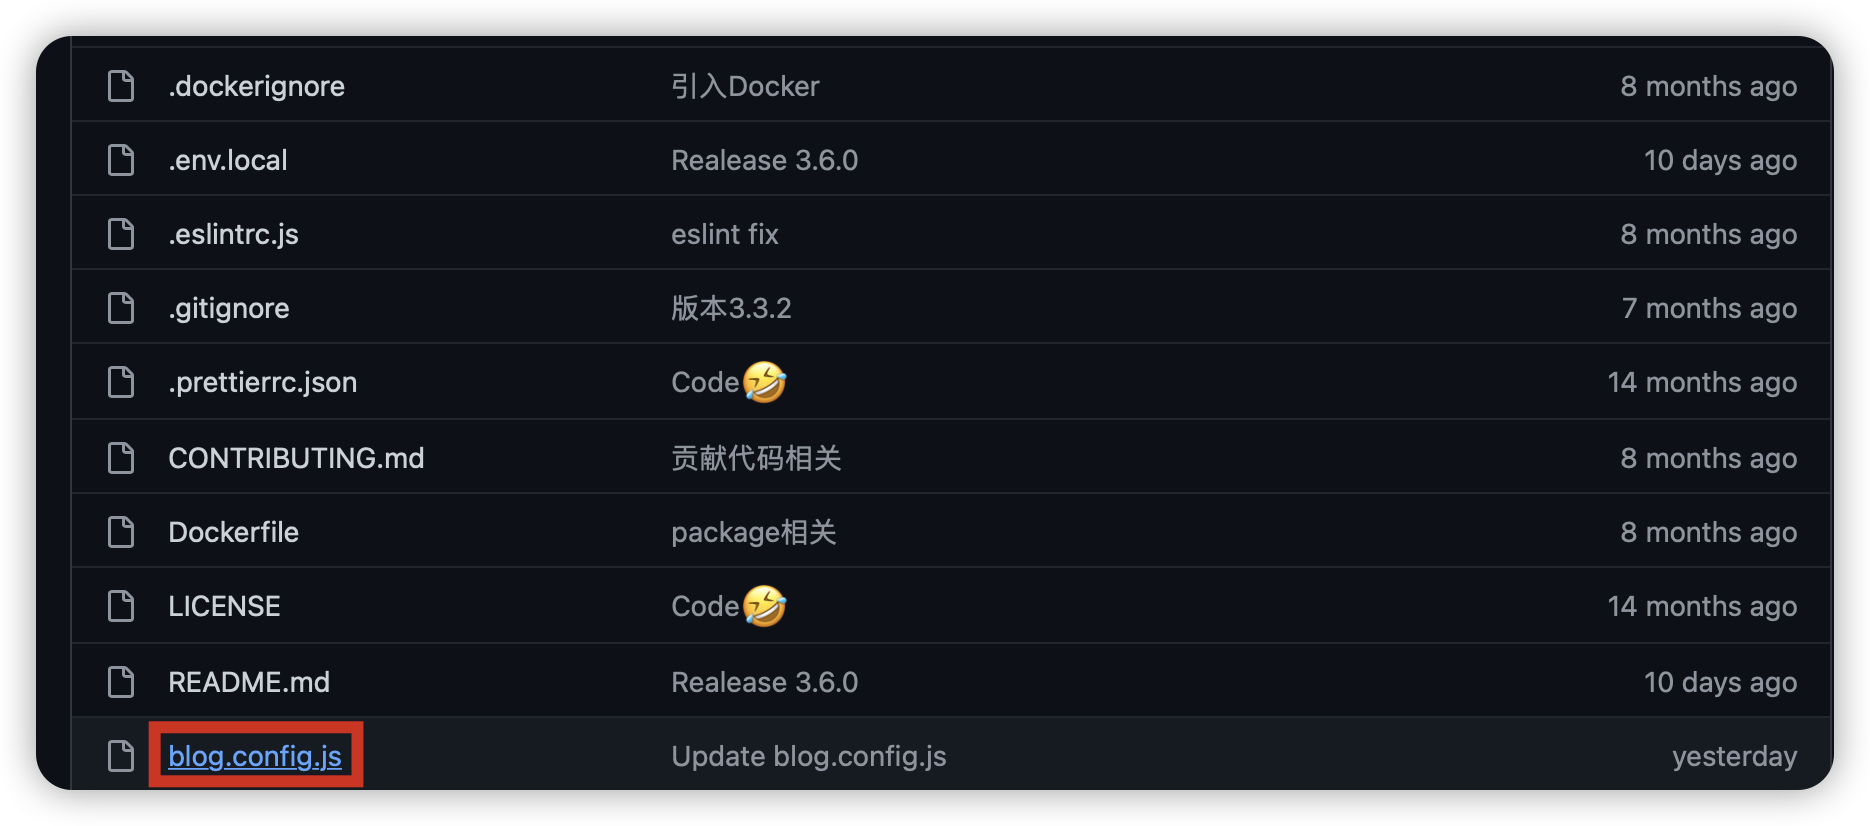
编辑文件
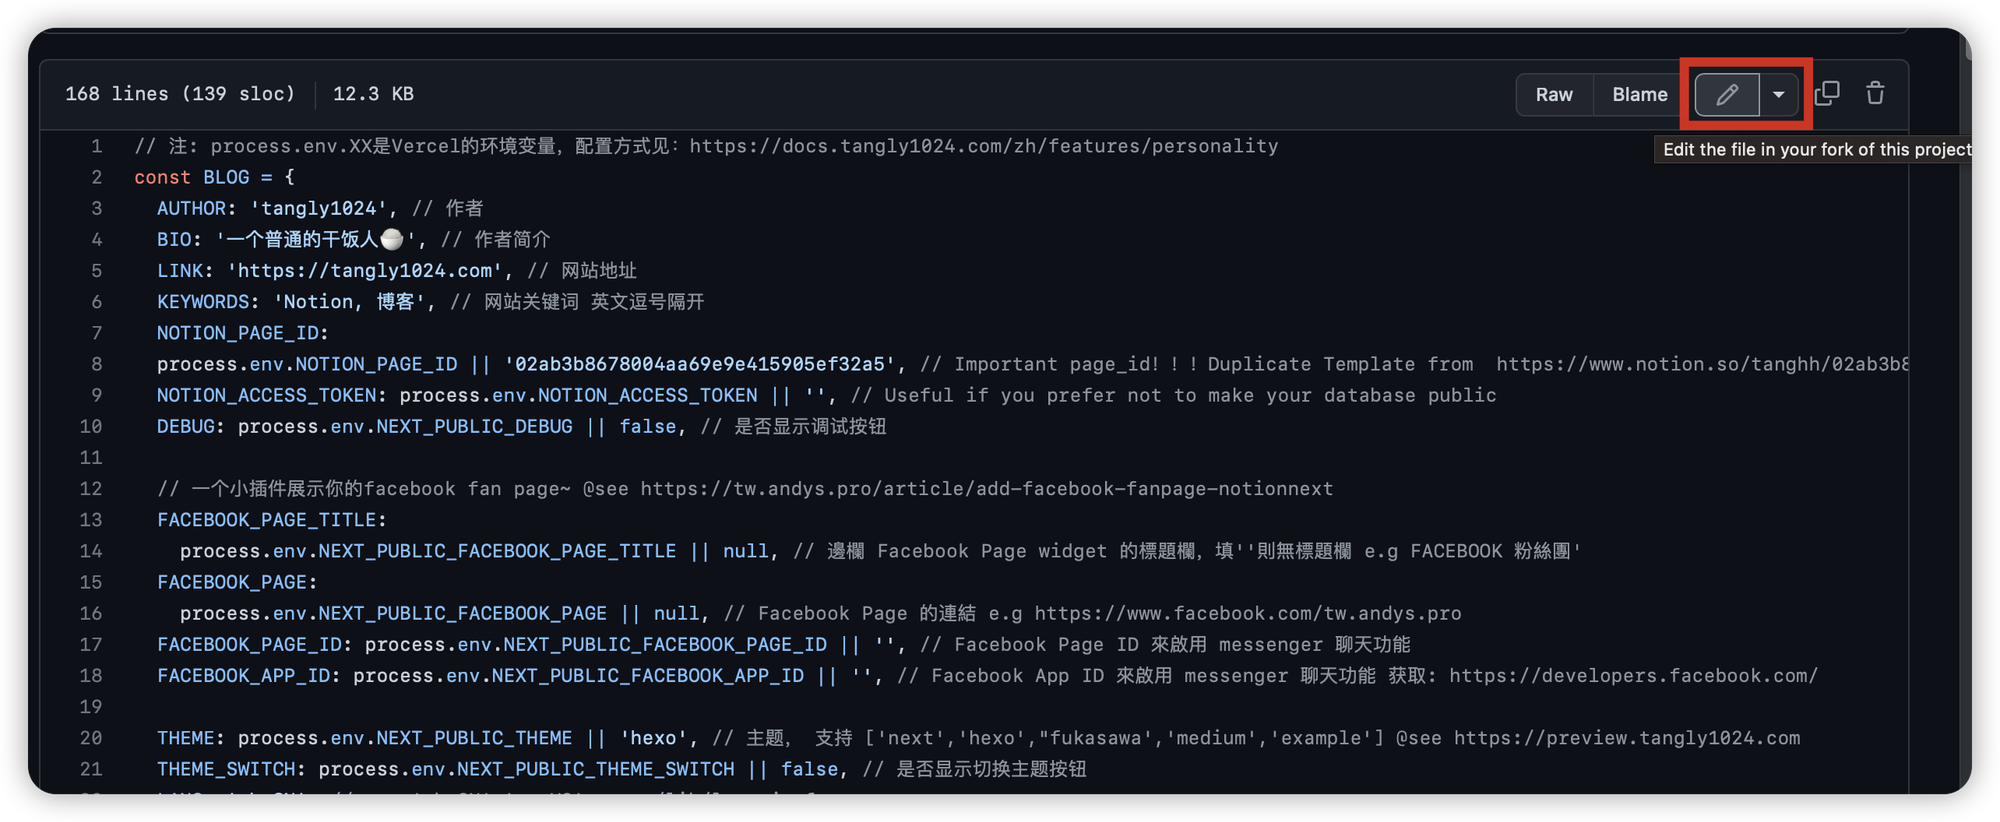
下面的
process.env.NOTION_PAGE_ID 是最重要的, 修改成你上面记录的 PAGE_ID,然后其他的自己对照后面的说明自己修改就行了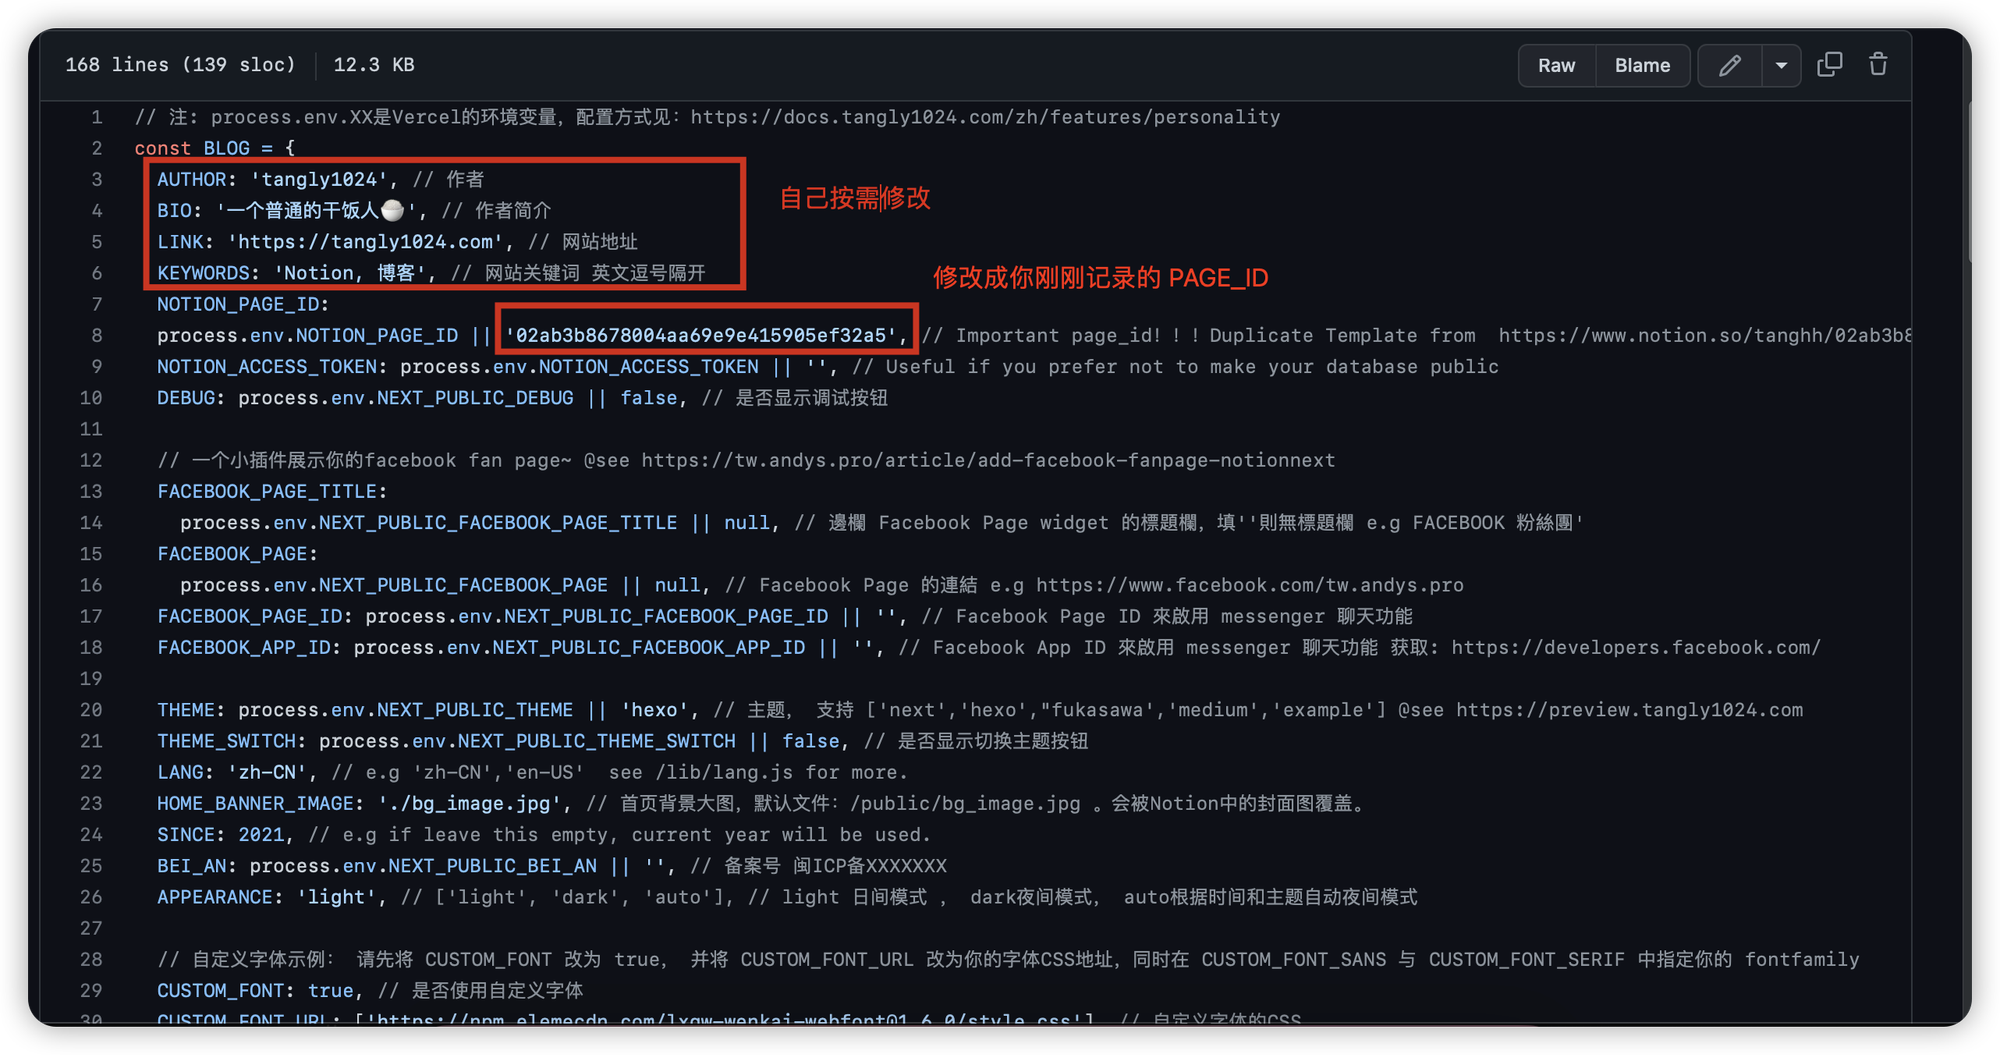
修改完提交,然后 vercel 那边会自动修改,等待一下就能看到结果了.
- 作者:我心永恒
- 链接:https://wxyhgk.com/article/web-notion
- 声明:本文采用 CC BY-NC-SA 4.0 许可协议,转载请注明出处。


