

type
Post
status
Published
date
Dec 22, 2022
slug
nas-synology-openwrt
summary
tags
思考
开发
category
学习思考
icon
password
Property
Jul 11, 2025 02:55 AM
URL
说明
- 机器: 黑群晖 dsm3167
- cpu: x86 处理器
- 系统: 7.1
这里说的是旁路由,那么旁路由是干嘛的呢?网上的例子太复杂,不然来说一个场景
比如你现在有 iPhone,安卓手机,电脑,平板,以及家人的各种设备,你现在想上 YouTube,你怎么做?
当然你可以每个设备都下载科学上网软件, 这样固然可以,但是会存在一些问题,比如说你每一个设备都需要安装科学软件,这样的话就很麻烦, 很多时候比如说你 ps5 我或者说有 switch 等设备, 这些设备是无法安装科学软件的, 那么我们怎么才能科学上网呢这个时候就需要用旁路由来操作了.
1. 准备工作
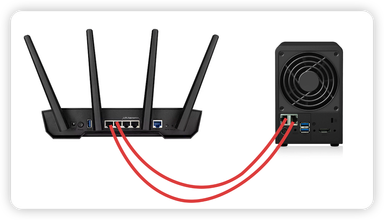
1.1 双网口
将你的 nas 的两个网口的线都插入到路由器上面,这点很重要,也就是说如果你的 nas 是单网口的你就不用继续往下看了
1.2 安装 docker
到群晖商店安装 docker 就行了
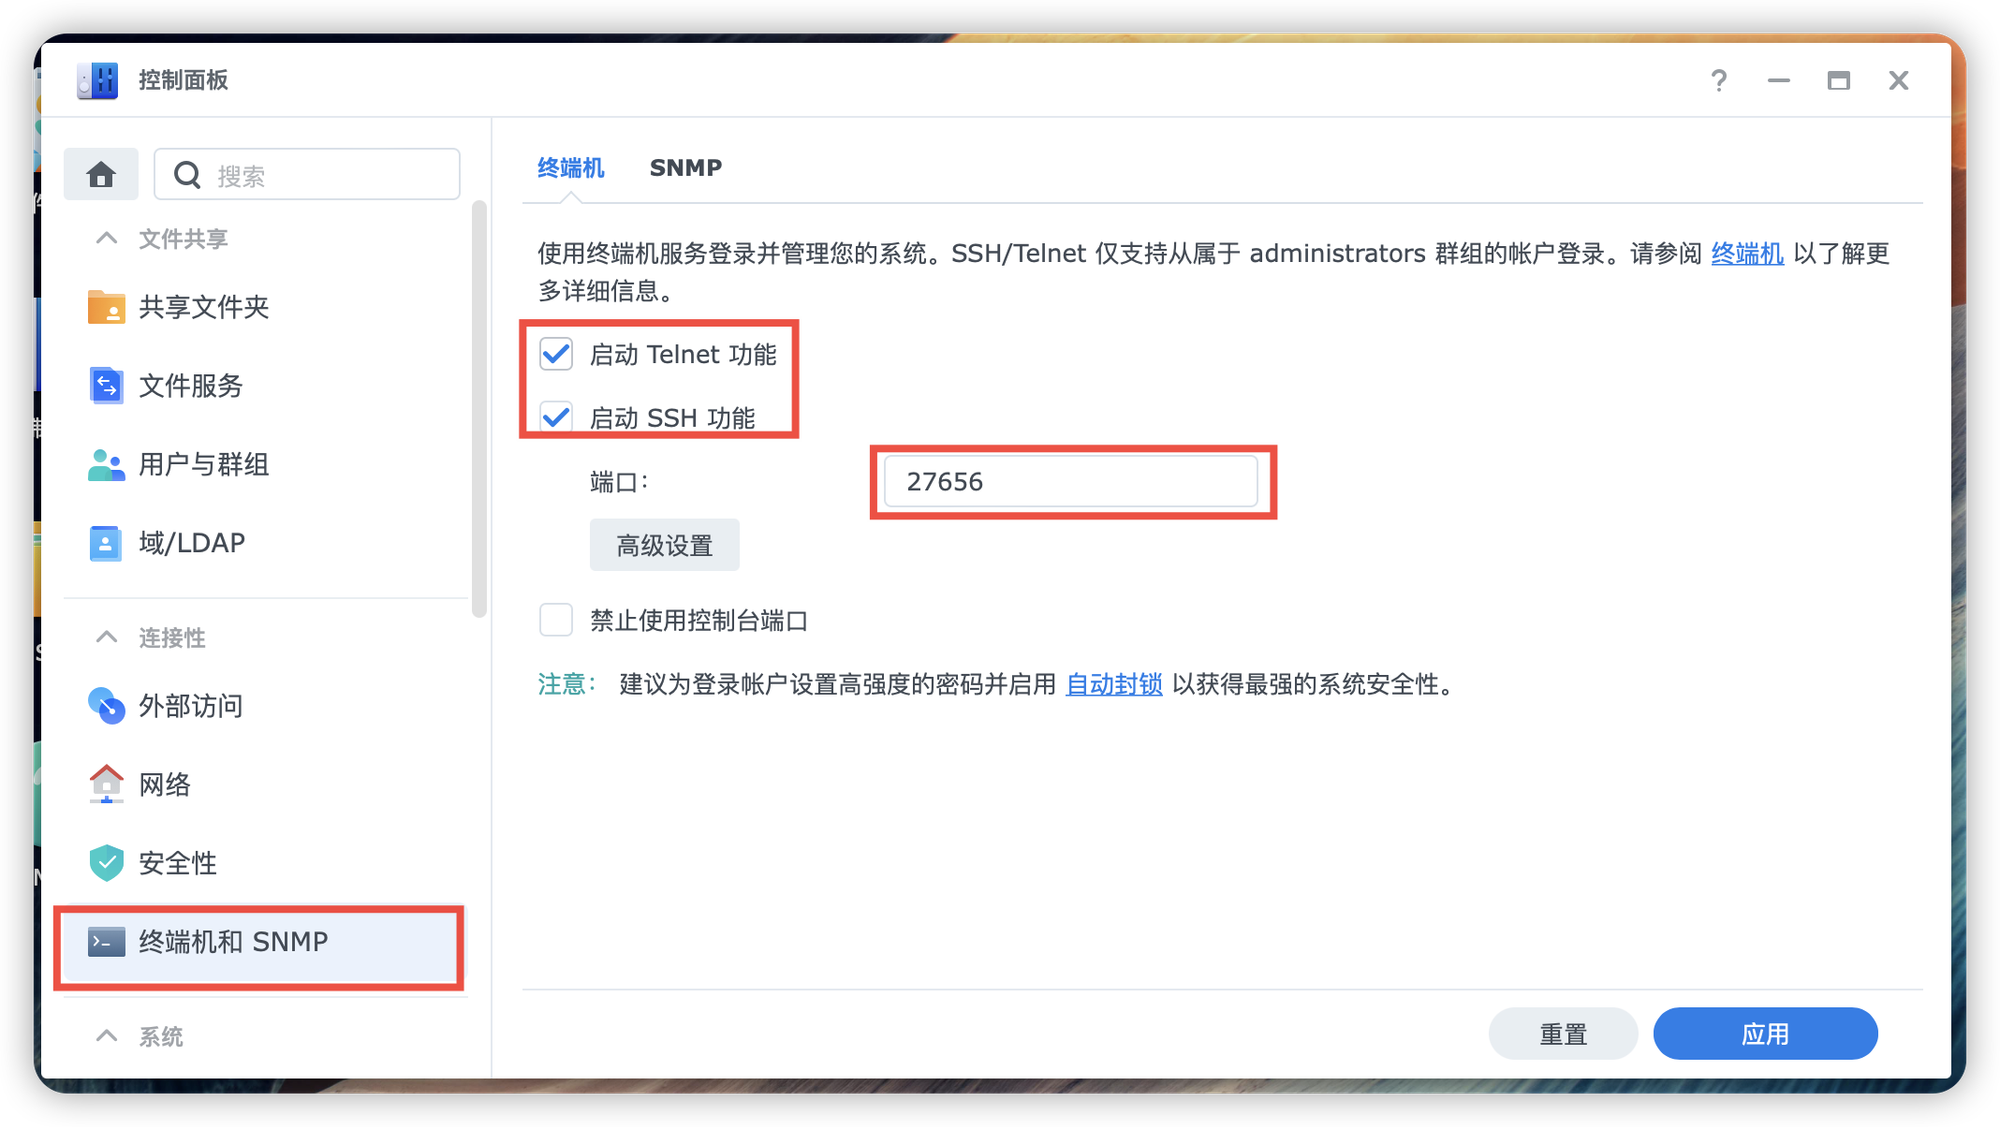
1.3 开启 ssh
进入群晖控制面板开启 ssh,端口号自己随便填,但是自己得记住
2. 安装 openwrt
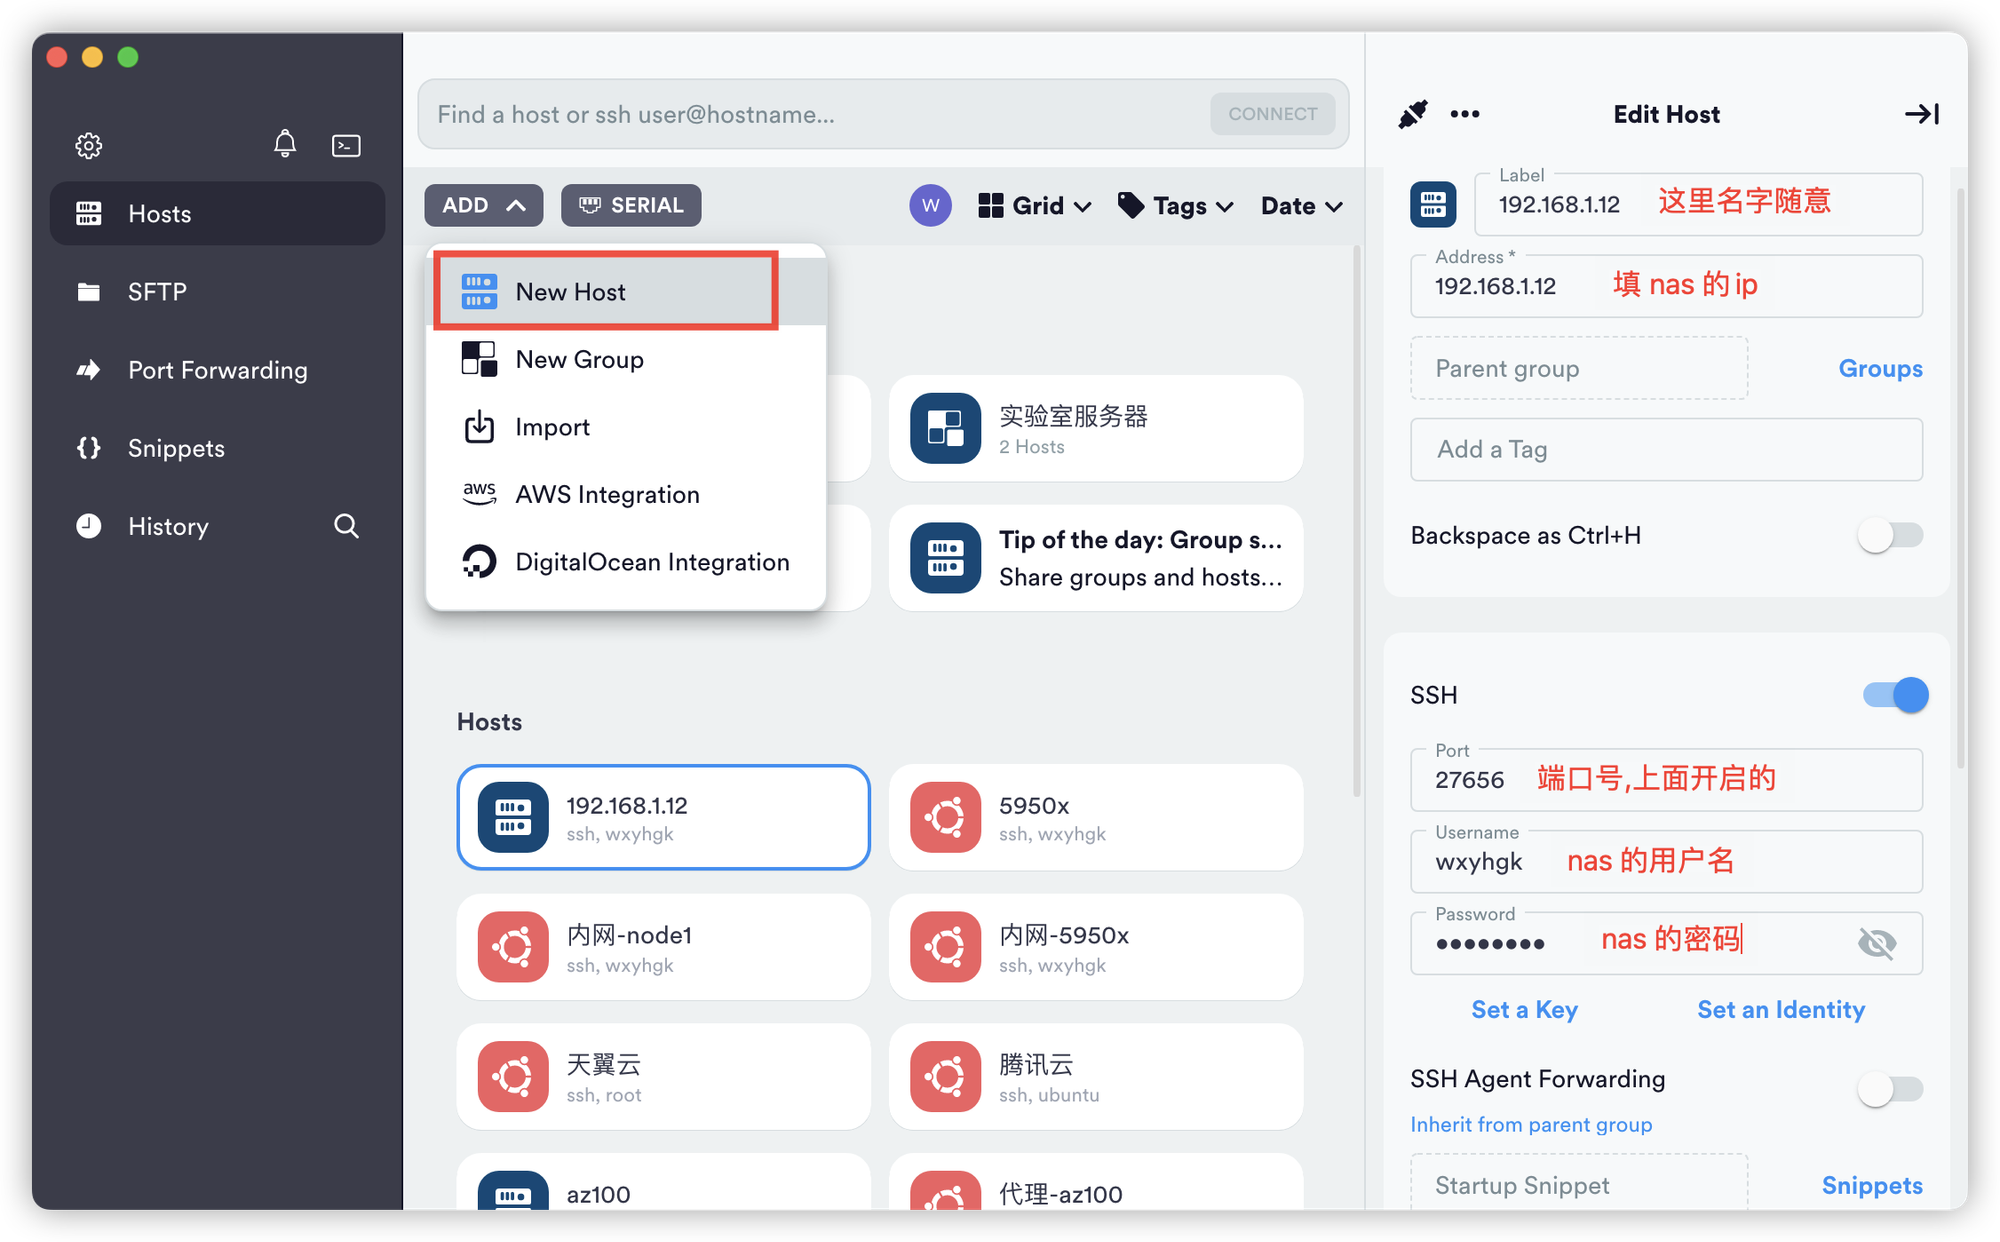
2.1 进入ssh
下载 ssh 工具(点我下载), 我的 nas 的局域网 ip 是: 192.168.1.12
2.2 查看网卡
使用命令
我的 nas 的 ip 是
192.168.1.12,所以我看一下下面的哪个是匹配的,从下面图中可以看到网卡名字叫做 eth0 的是匹配的,如果你的 nas 使用了虚拟机可能会不一样,注意区分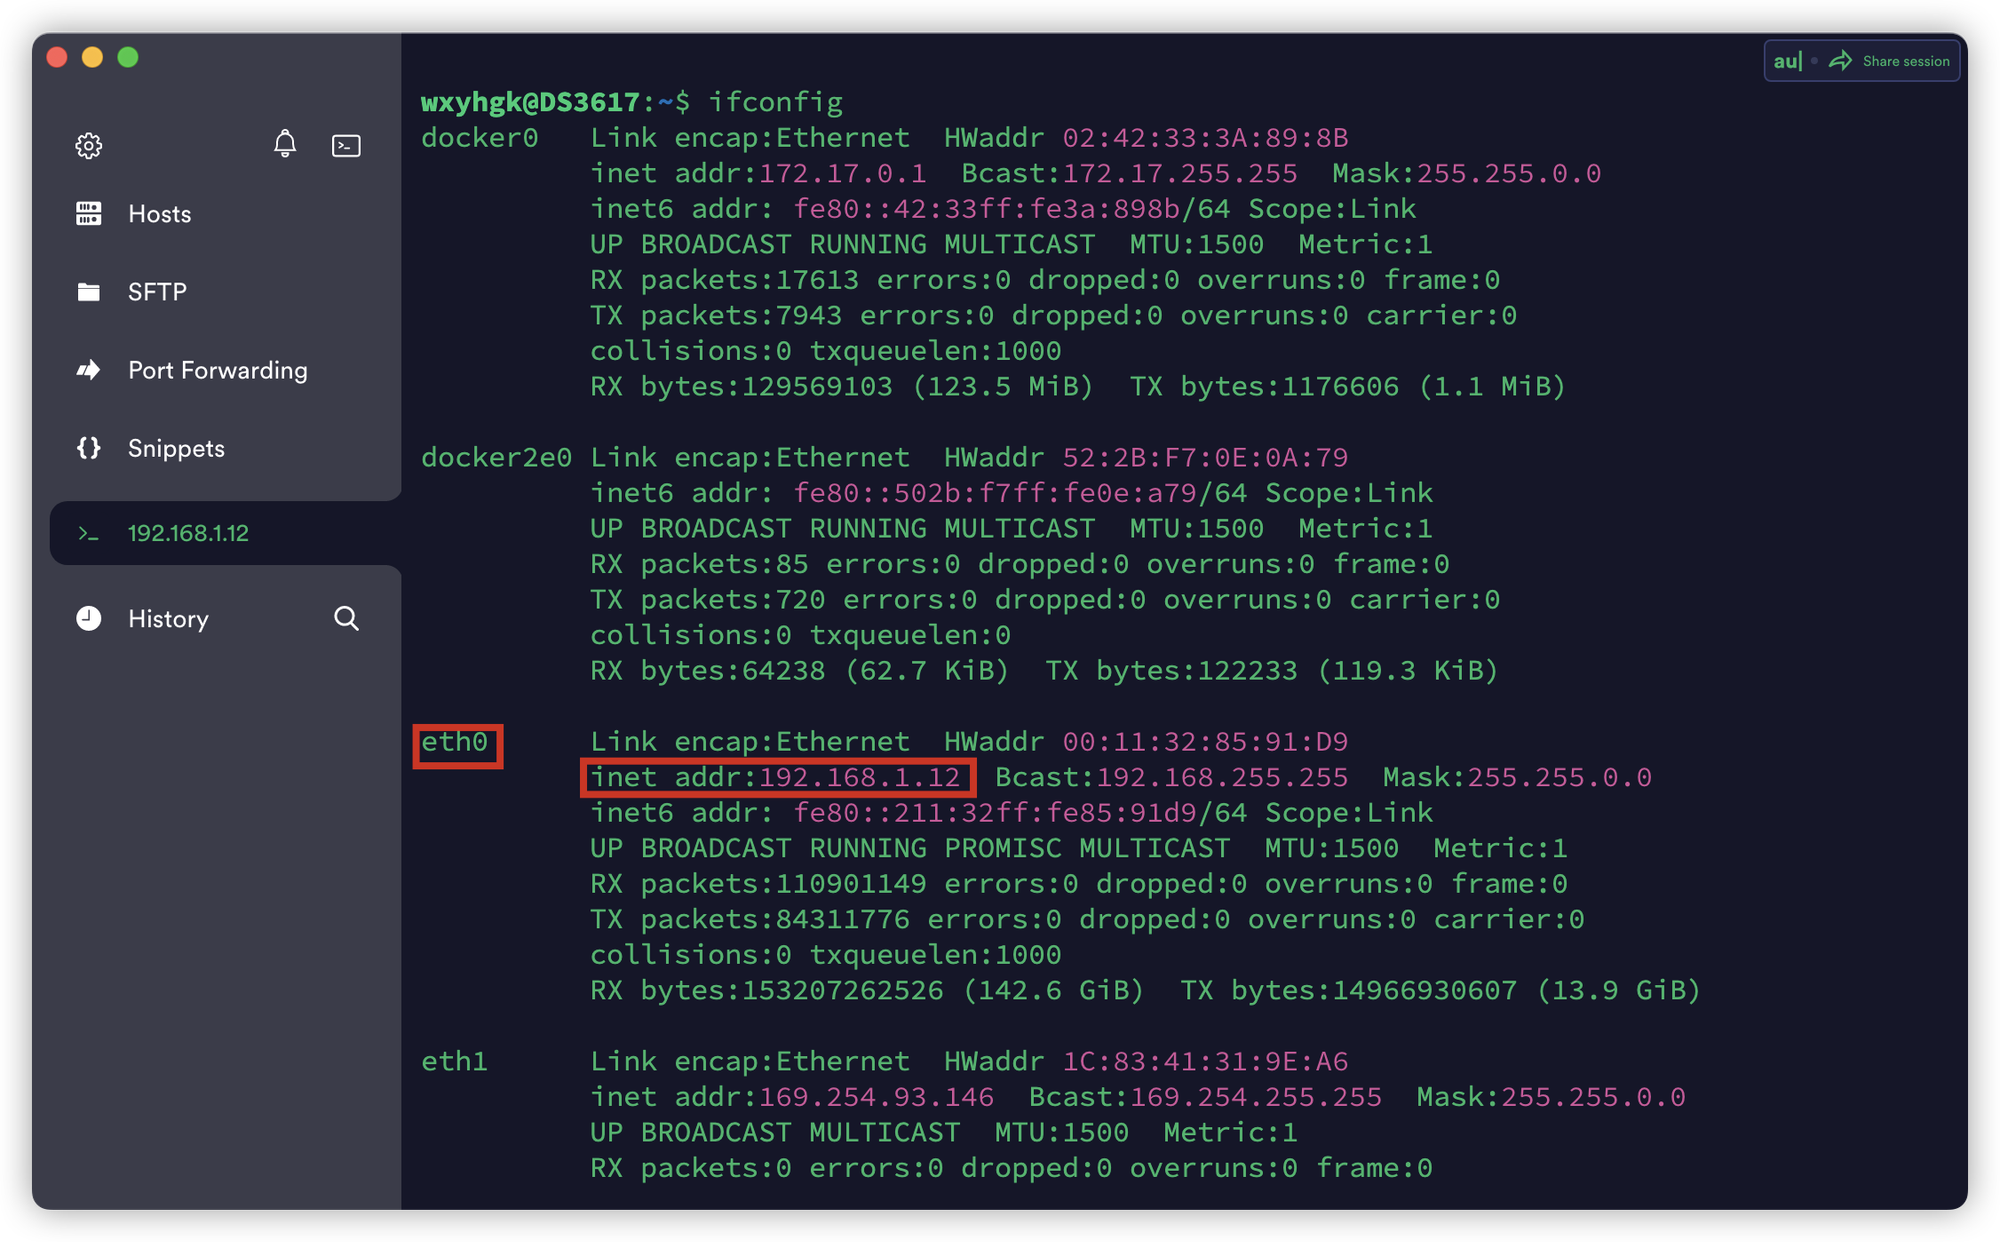
2.3 开启混杂模式
首先开启管理员模式
密码是你的nas的密码
接着使用命令
上面的
eth0 是我的网卡2.4 创建 docker macvlan 网络
注意上面的
192.168.1.1是你的路由器,每个人的不一样
192.168.1.0/24中的192.168.1是你路由器192.168.1.1的前三位
eth0是你的网卡名字,上面已经说过了
使用上面的命令之后,在群晖的 docker 上便可以看到了
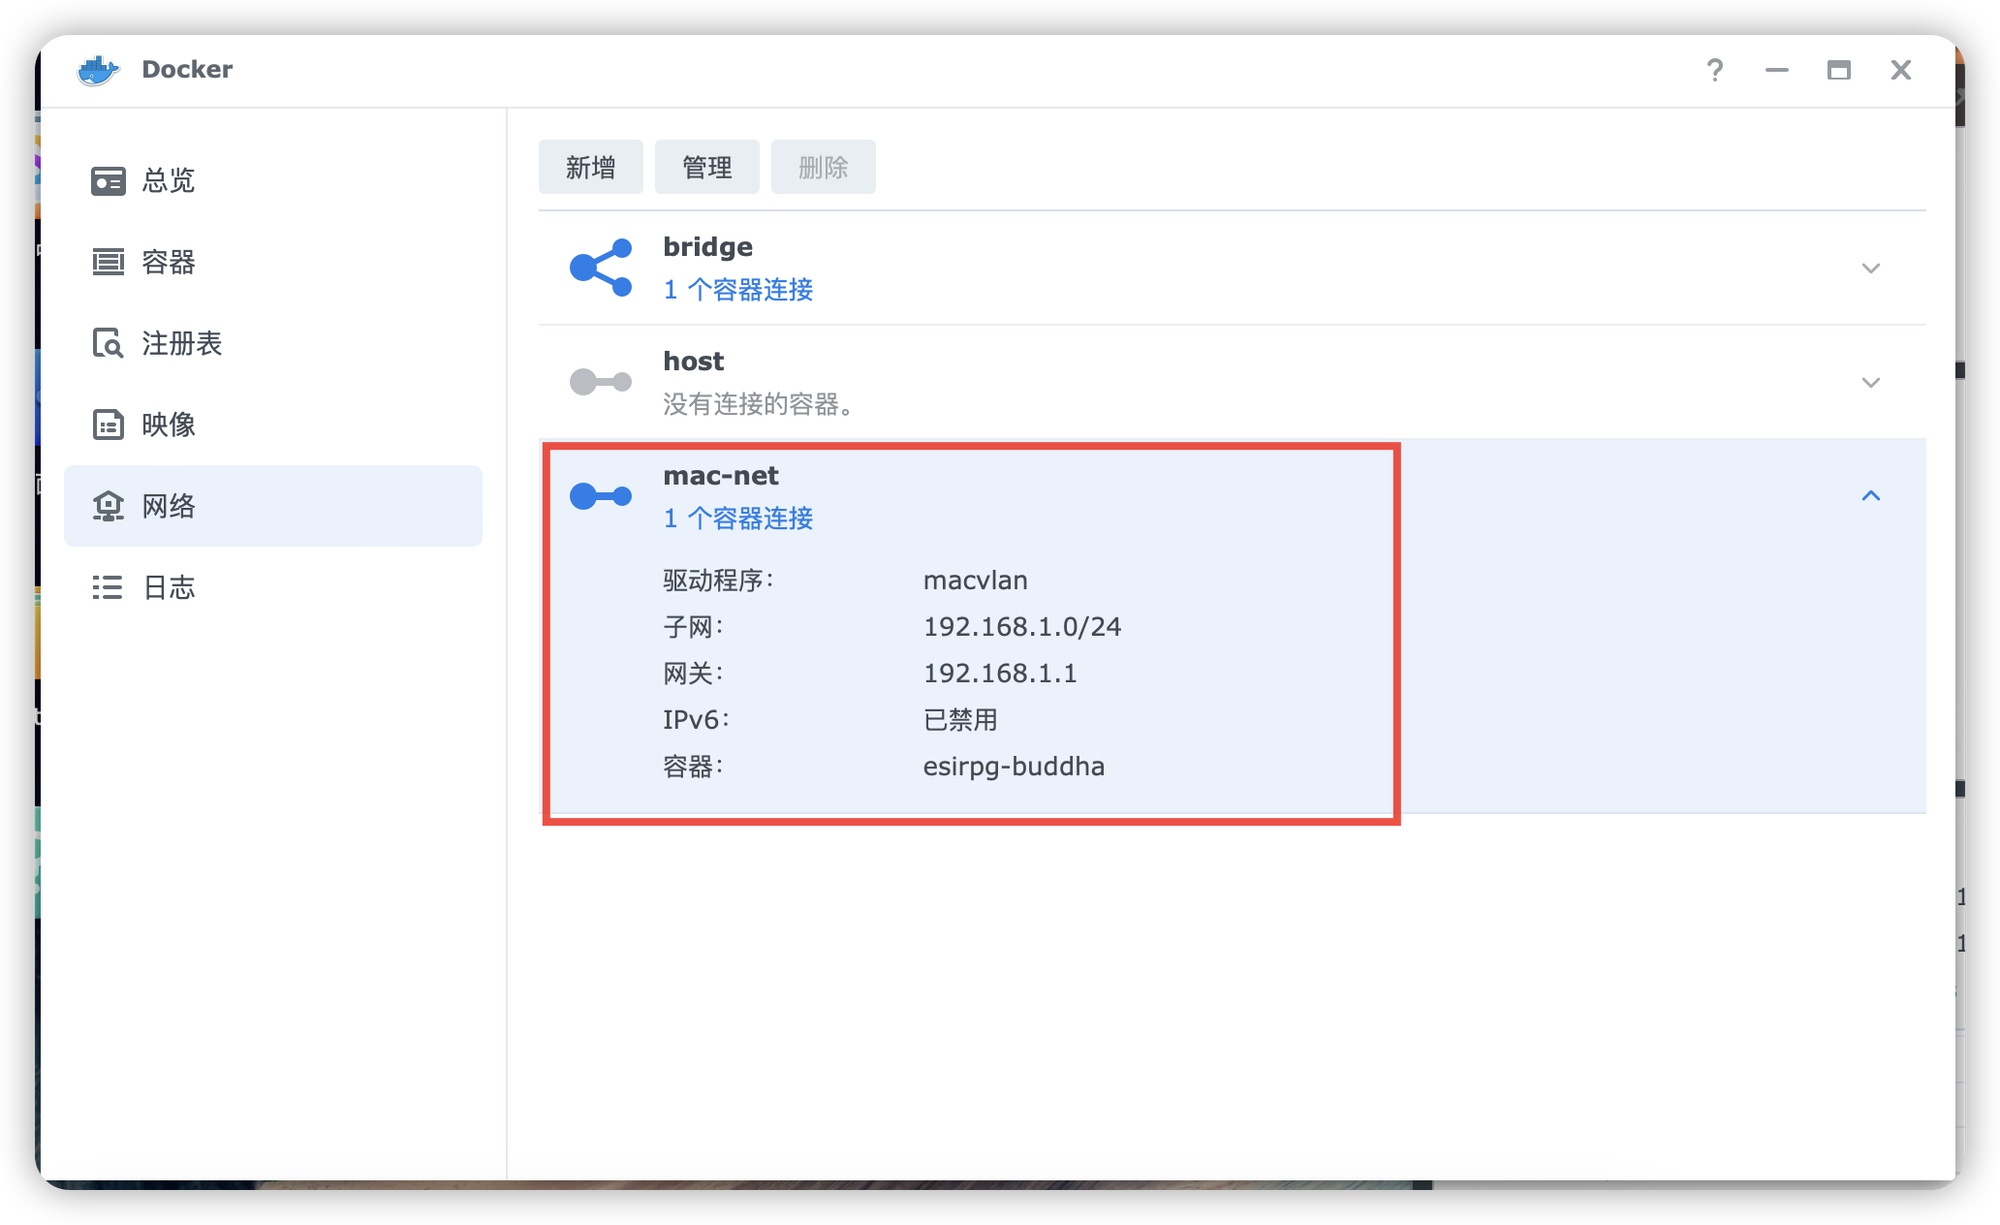
可以看到上面的图中和我们填的一样的
2.5 拉取 OpenWrt 容器
2.6 启动 OpenWrt 容器
注意上面的
192.168.1.13 是我设定的旁路由的 ip ,自己到路由器查看一下有没有设备占用这个 ip ,如果有就改成一个其他的,比如 192.168.1.14 等等,具体看你的家庭路由器情况2.7 OpenWrt 容器设置
- 使用命令进入 openwrt 容器
- 修改配置
找到
config interface ‘lan’ 下面的 option ipaddr 后面的ip ,修改成我上面修改的 192.168.1.13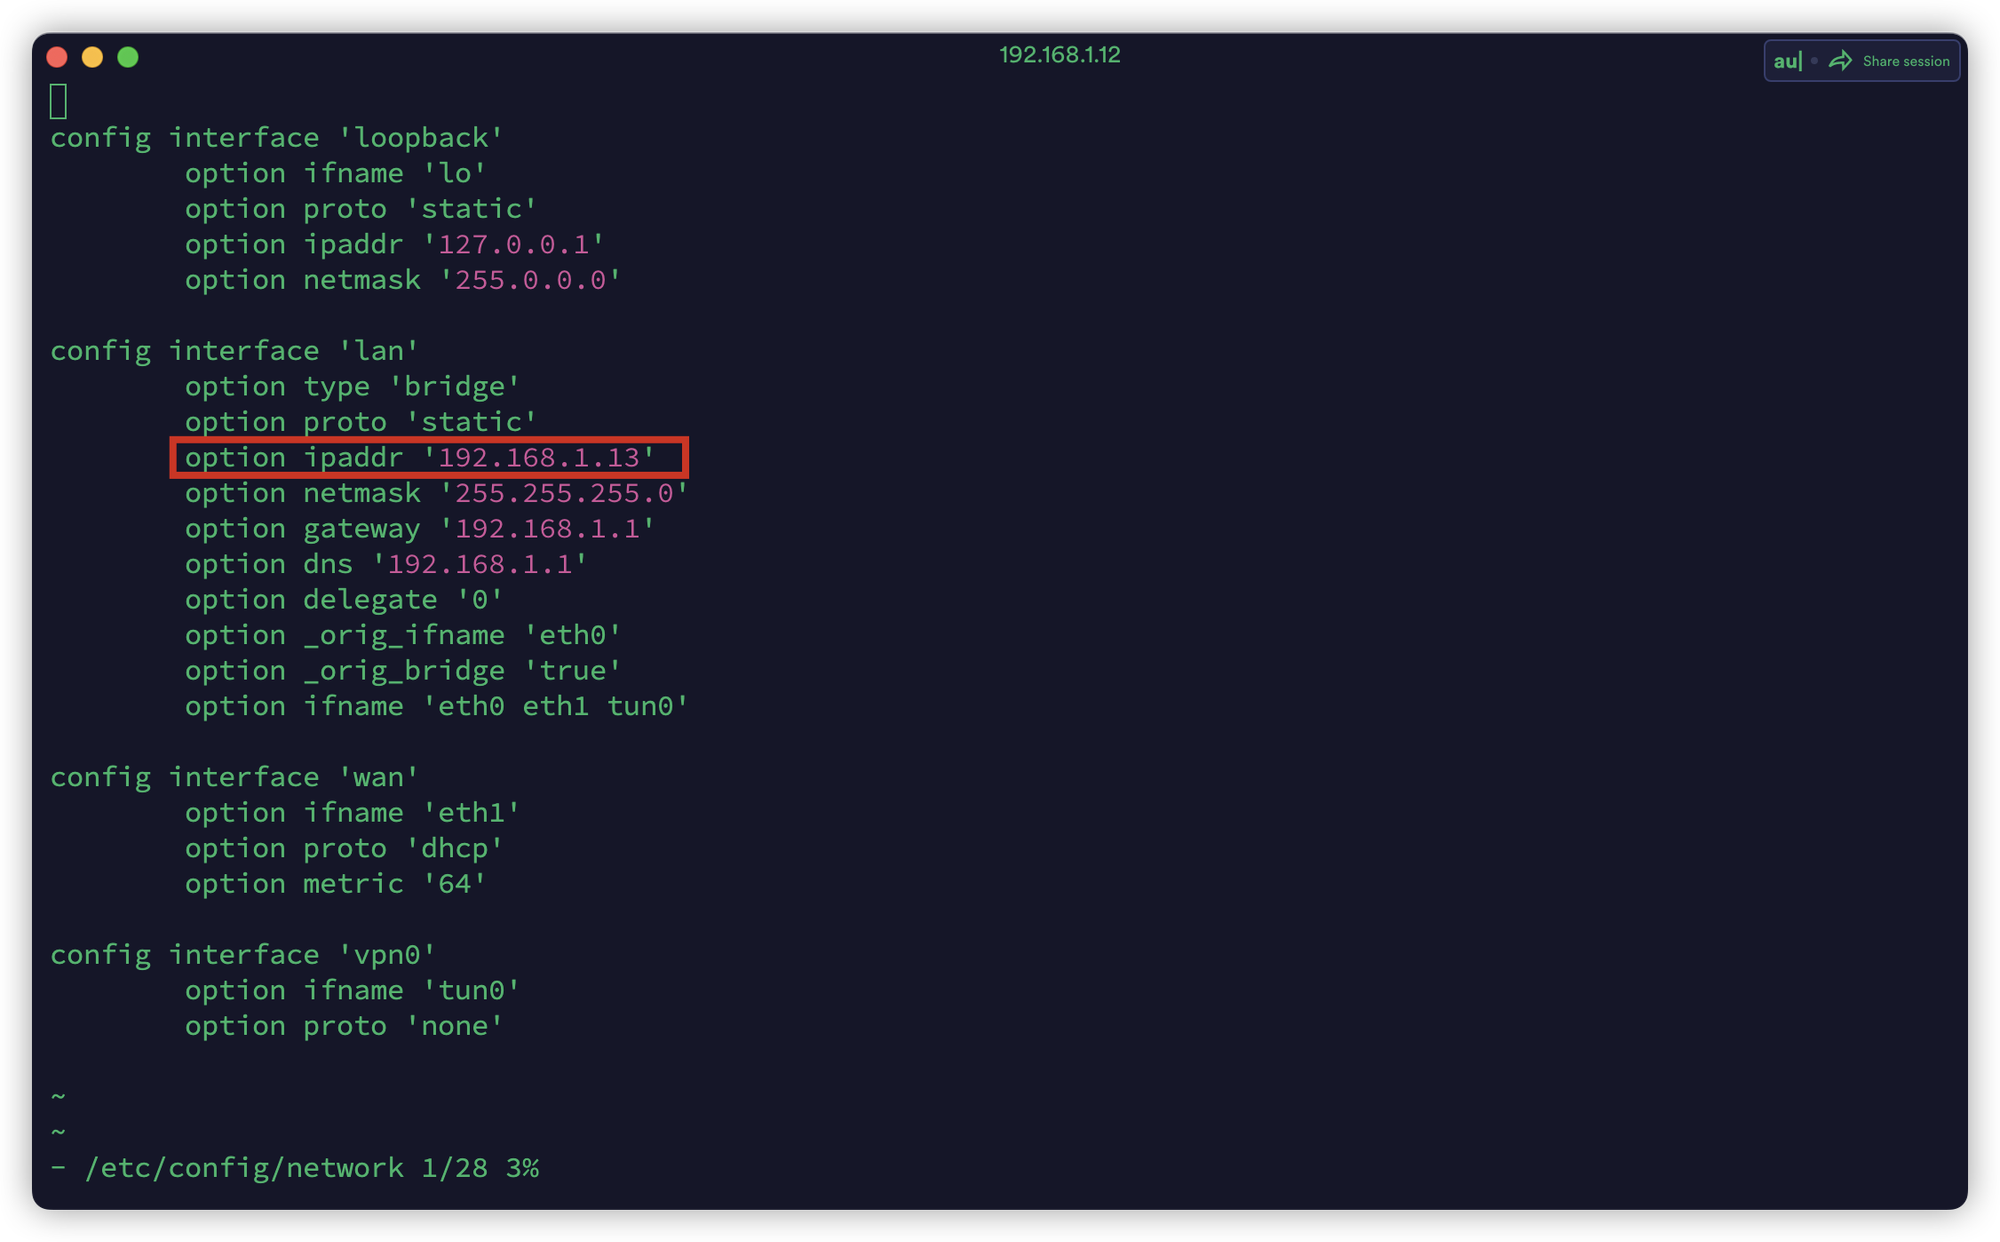
- 重启服务
- 退出容器的ssh
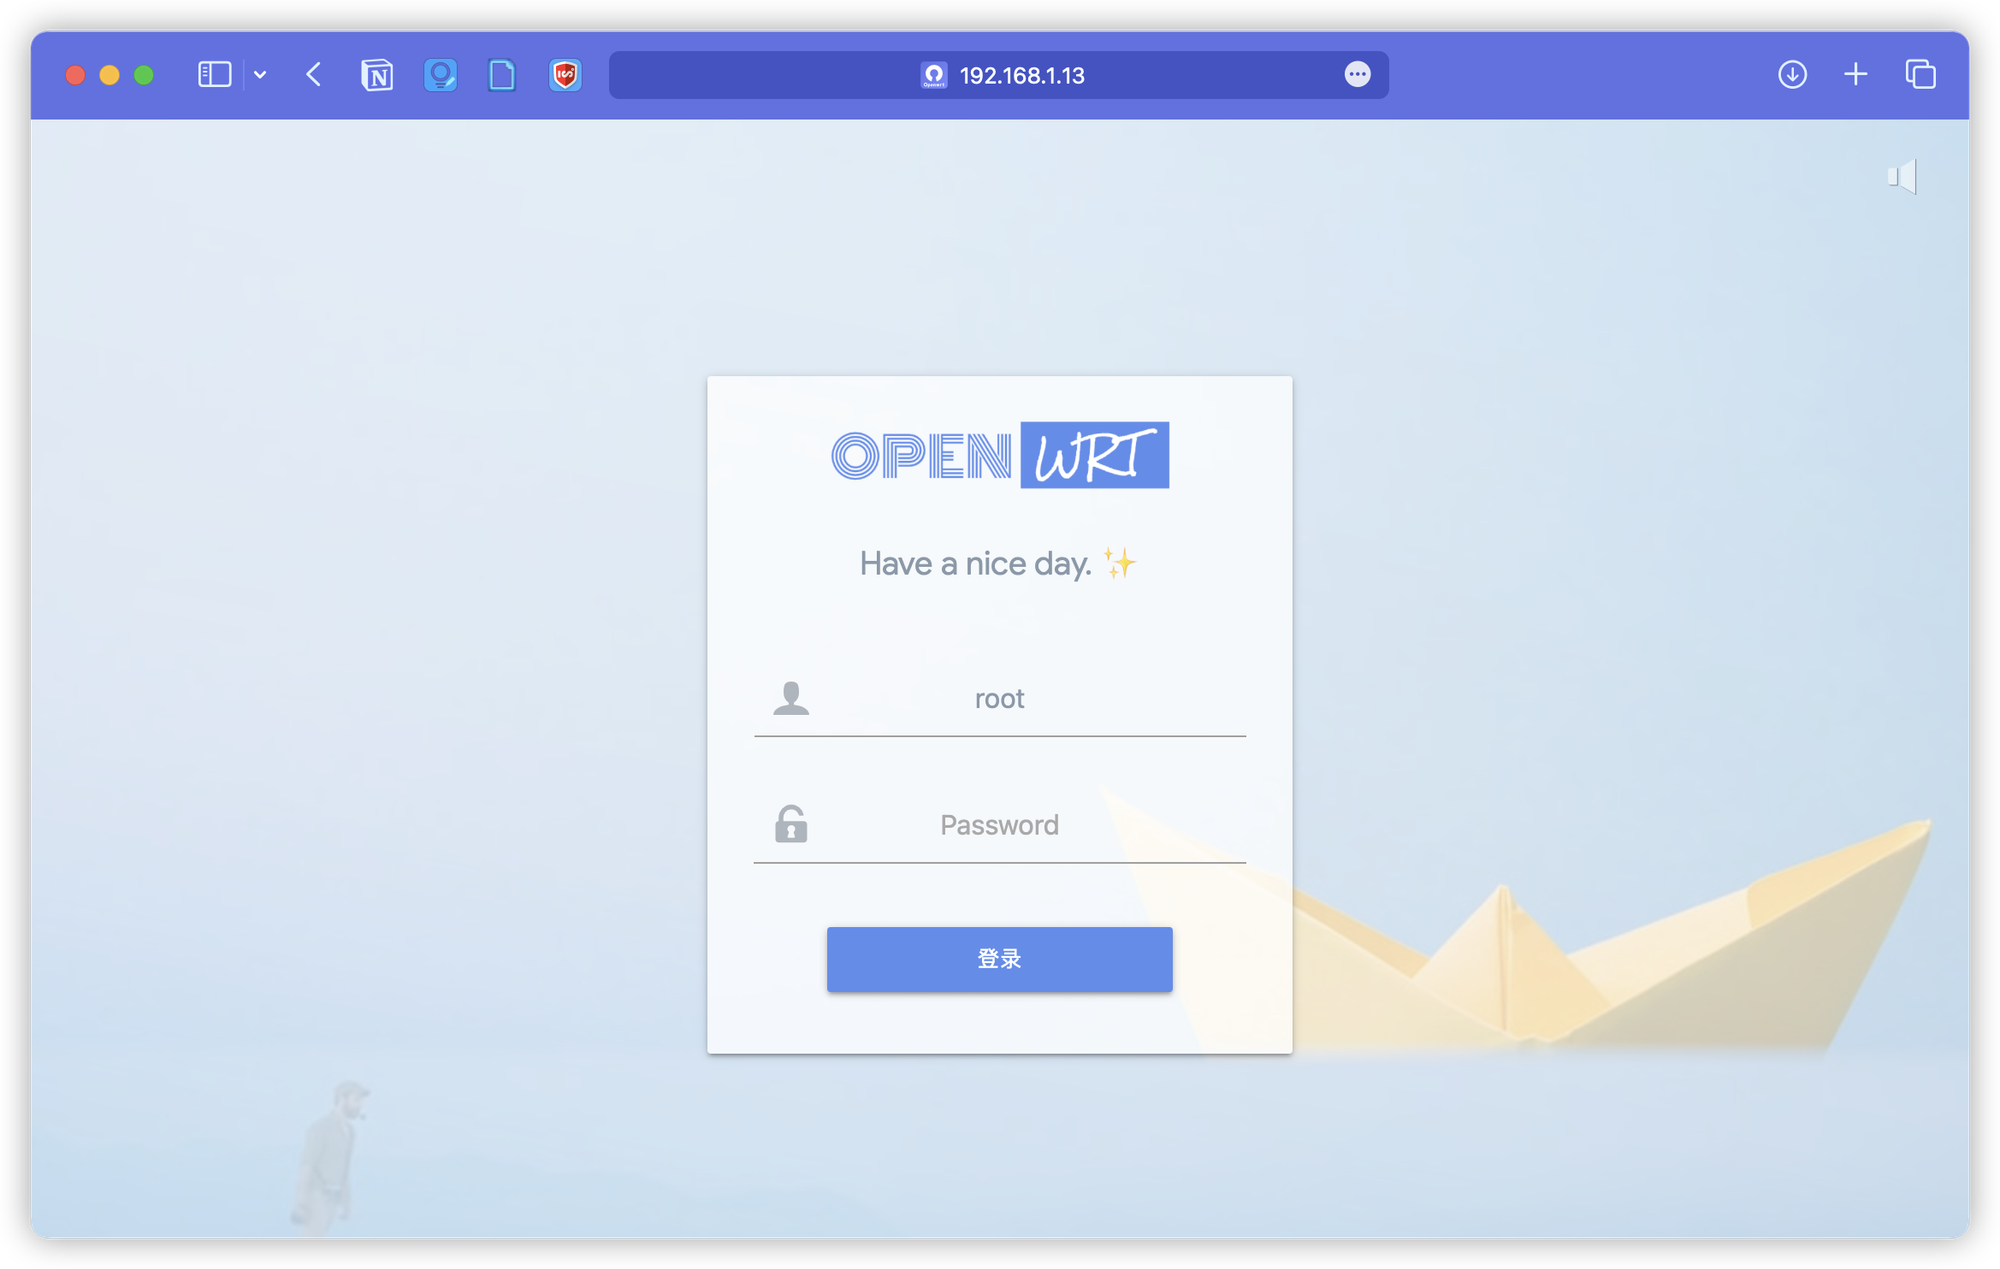
到这里 openwrt 就安装好了, 可以在浏览器输入
192.168.1.13 就能进入容器了3. openwrt 设置
默认账号是 root ,开始的时候没有账号,进入后会提示你修改
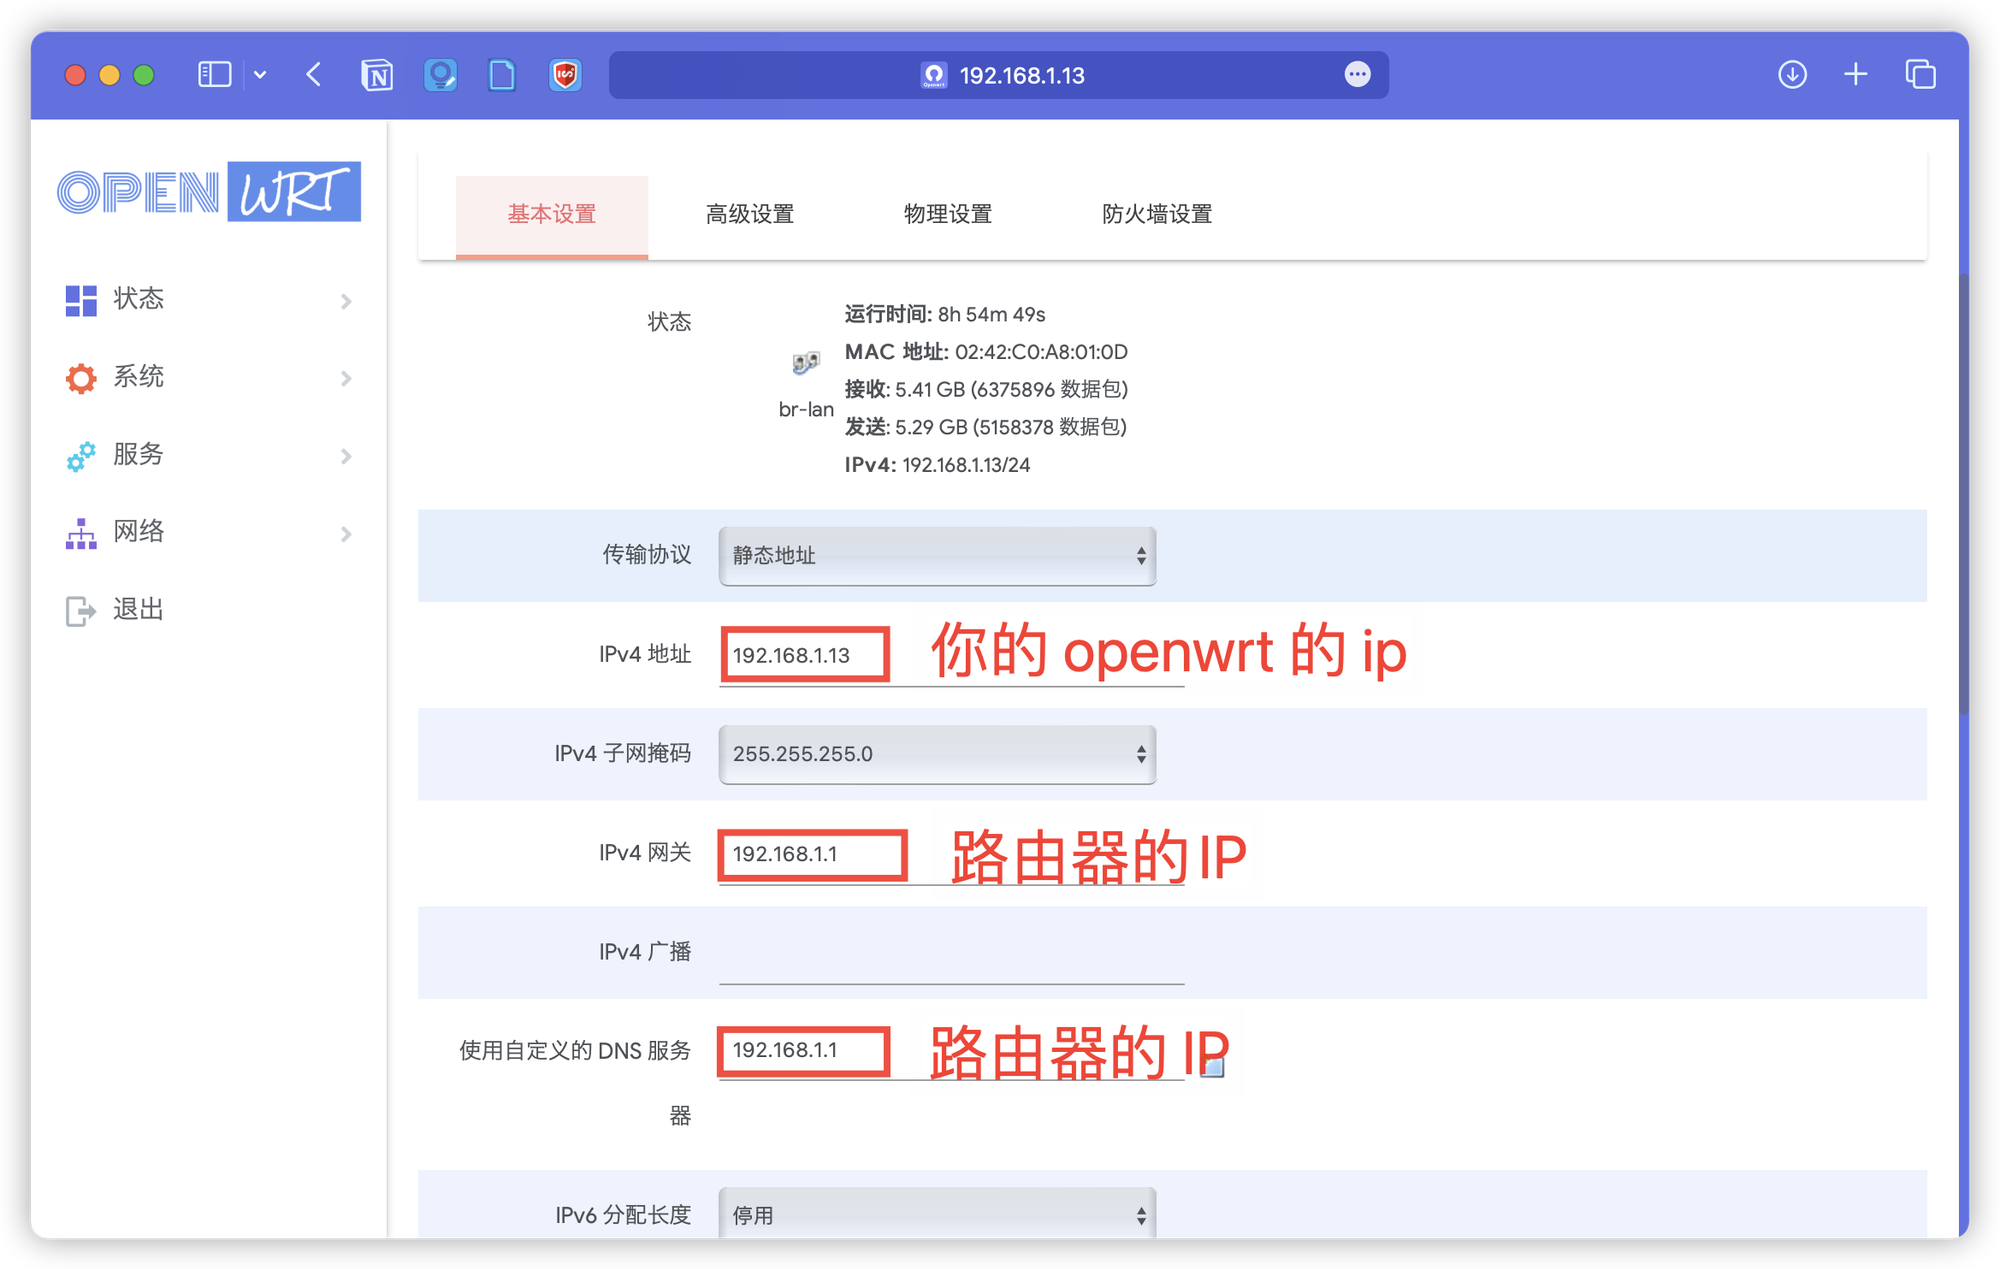
3.1 LAN 口修改
进入后,找到如下所示的地方,修改
LAN 口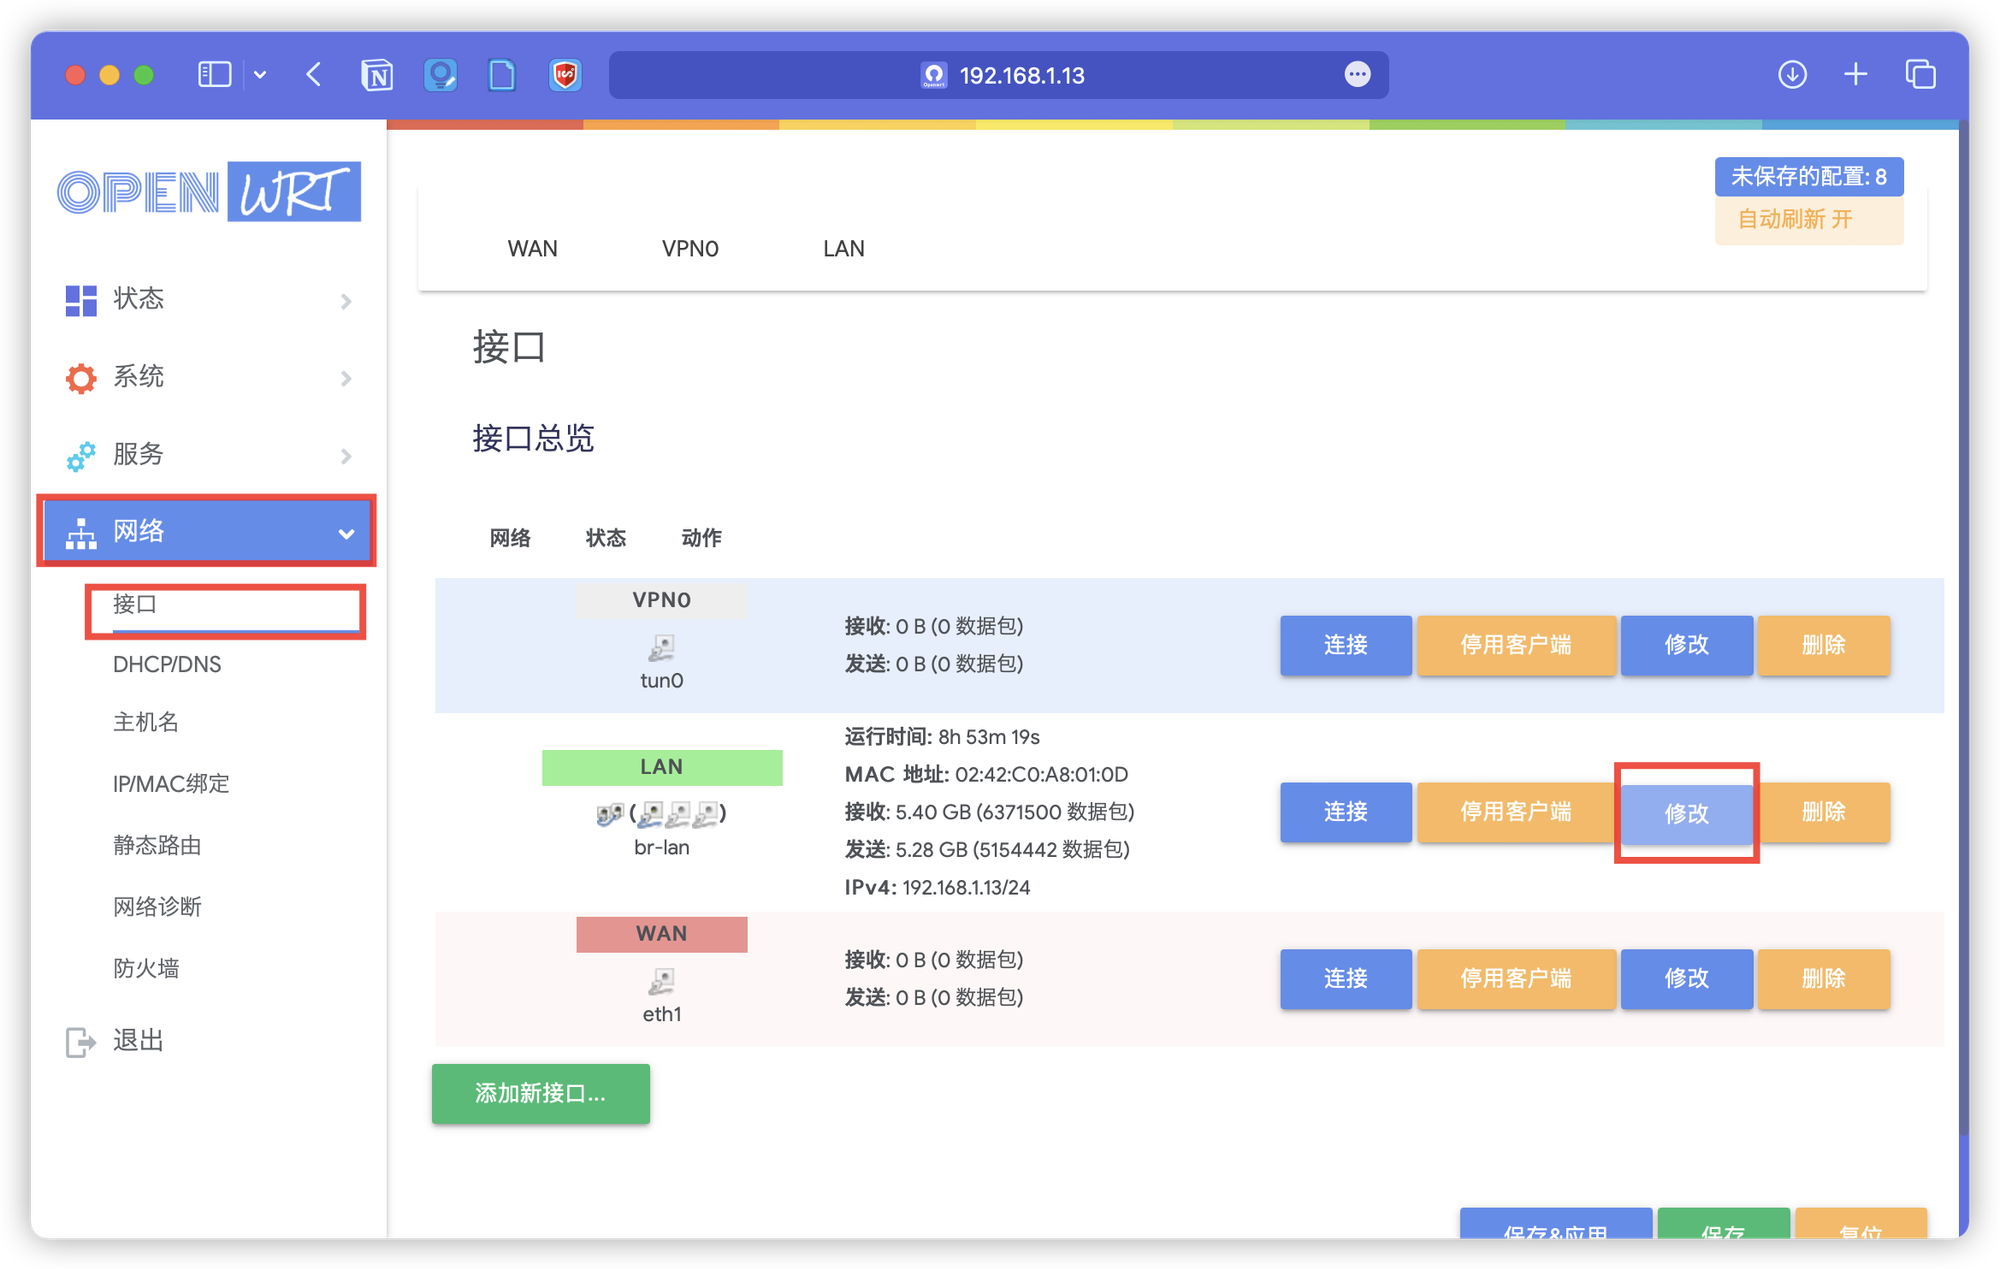
修改如下
拉到下面选中这个忽略此接口,最后
保存&应用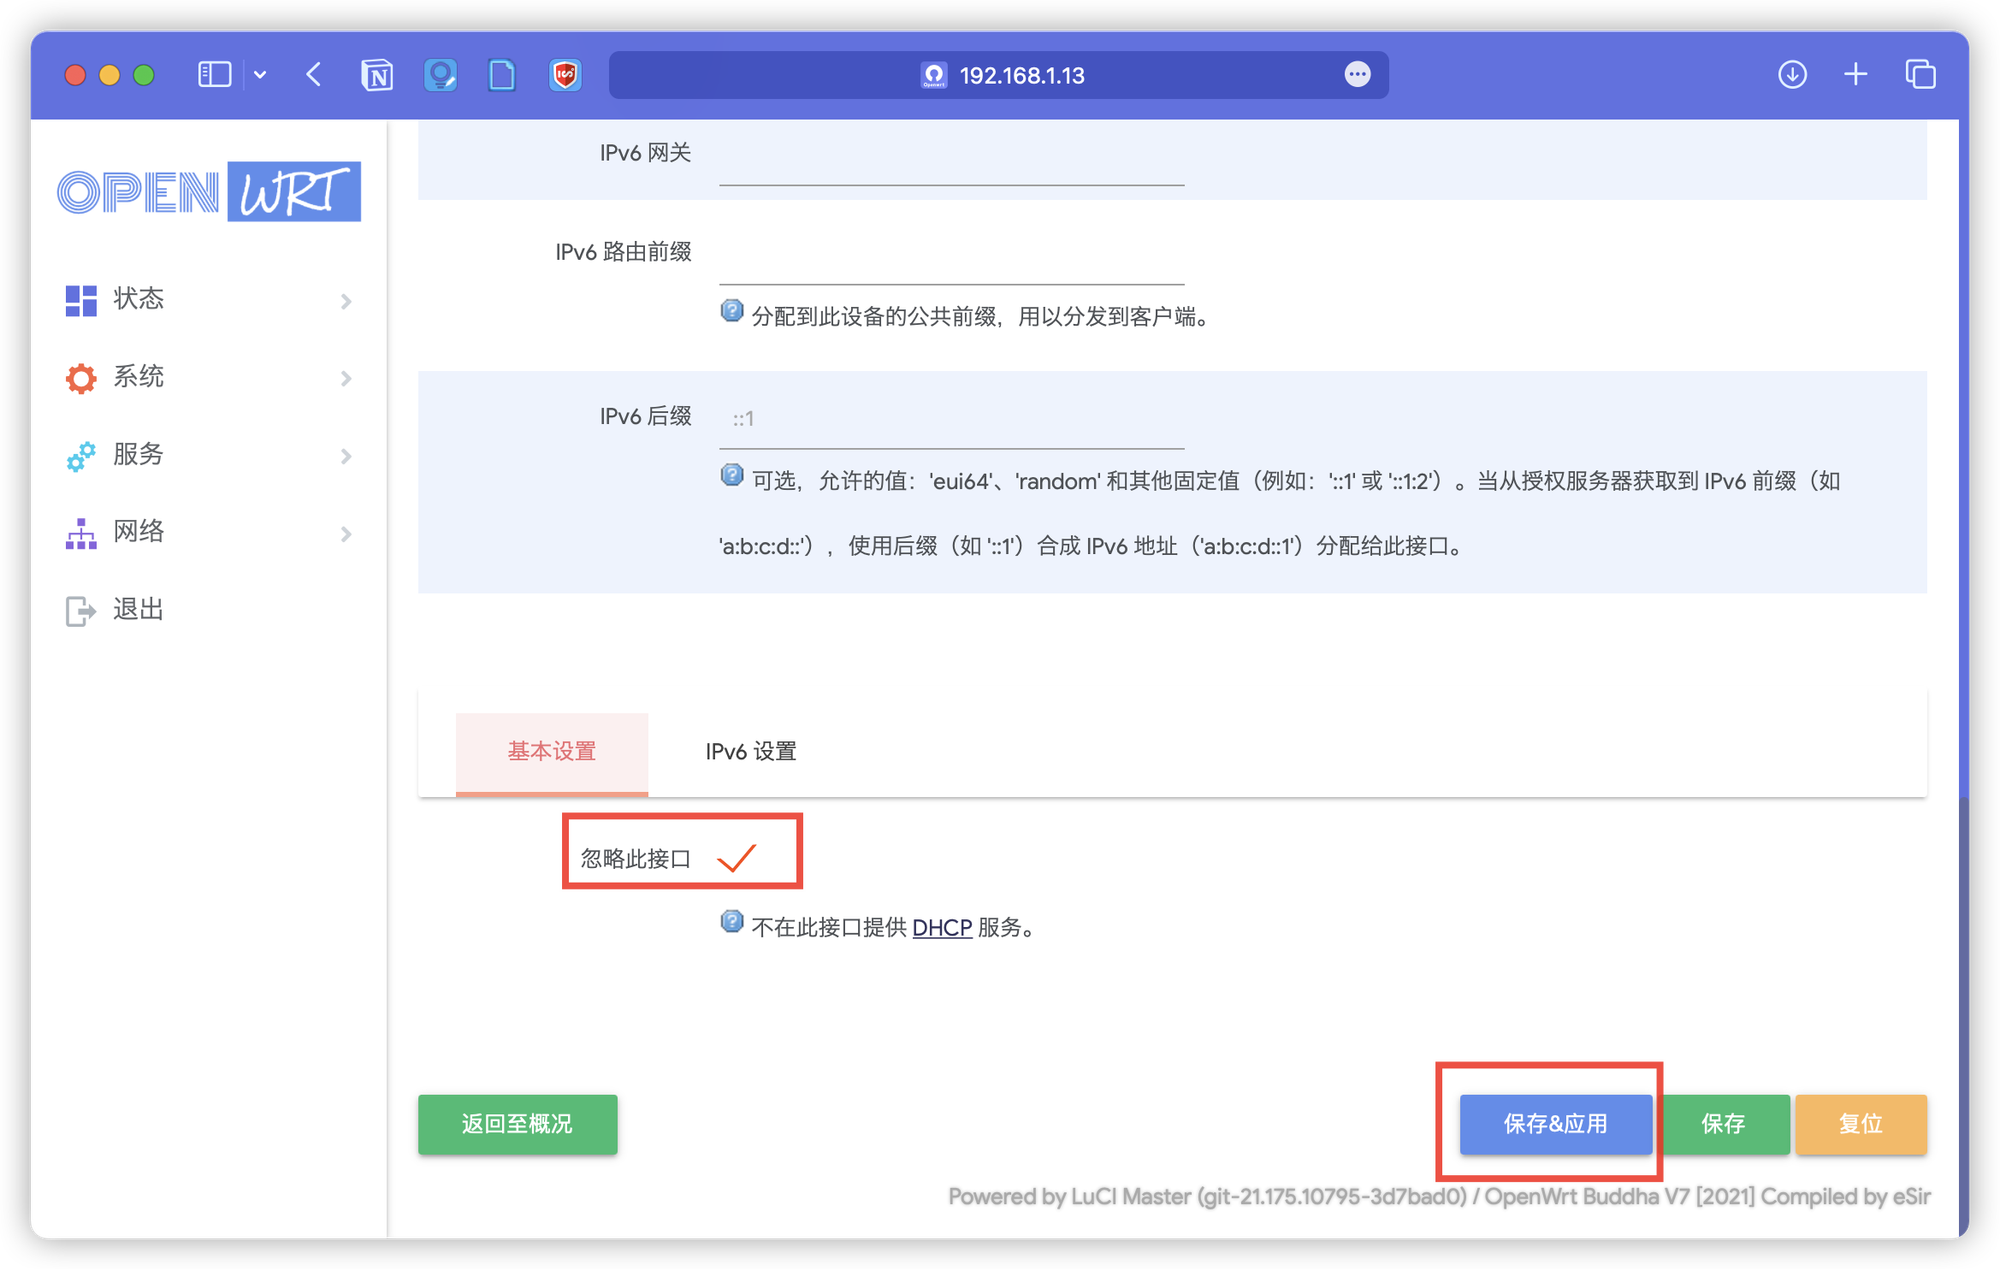
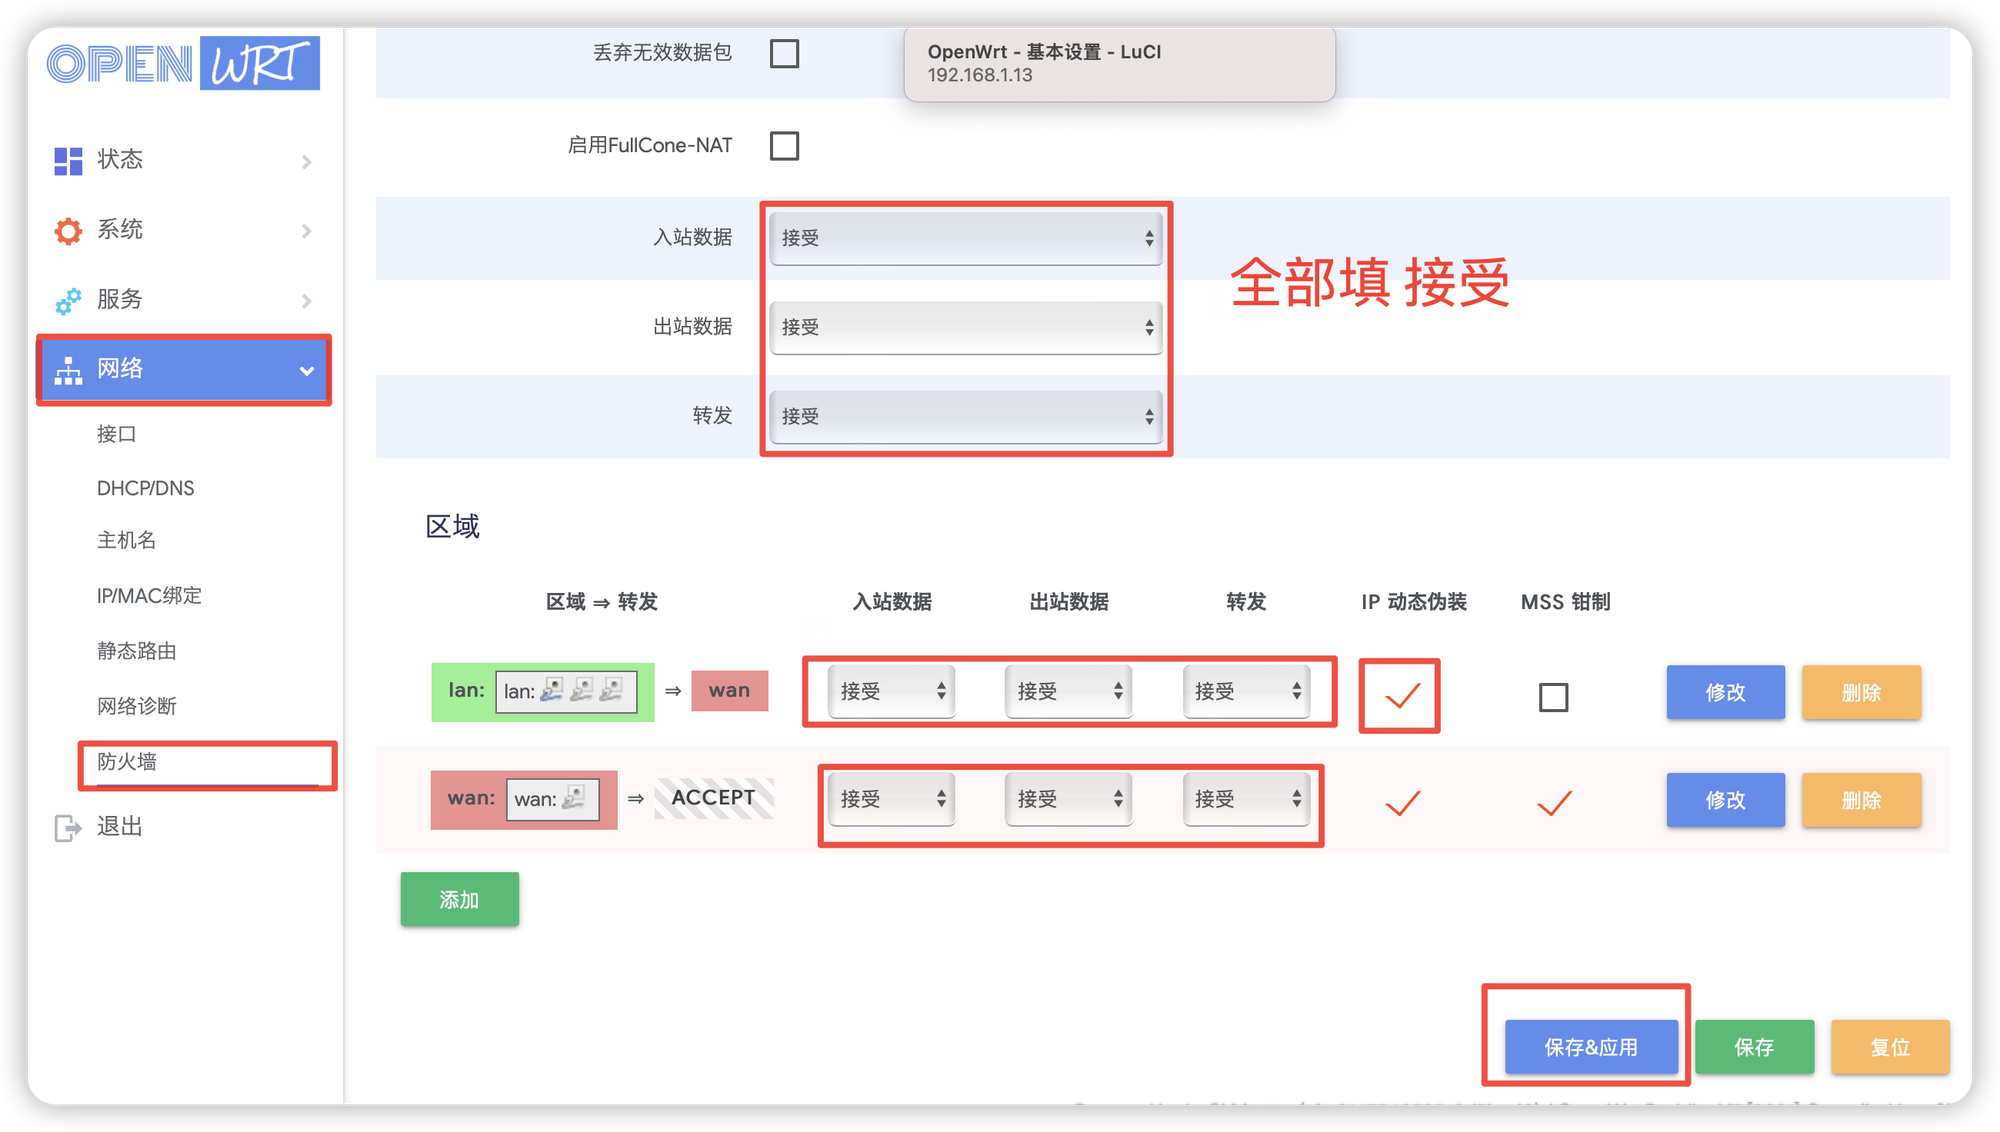
3.2 防火墙设置
按照下面设置就行了
3.3 安装 clash
到这里下载(点我),下载
clash-linux-amd64 的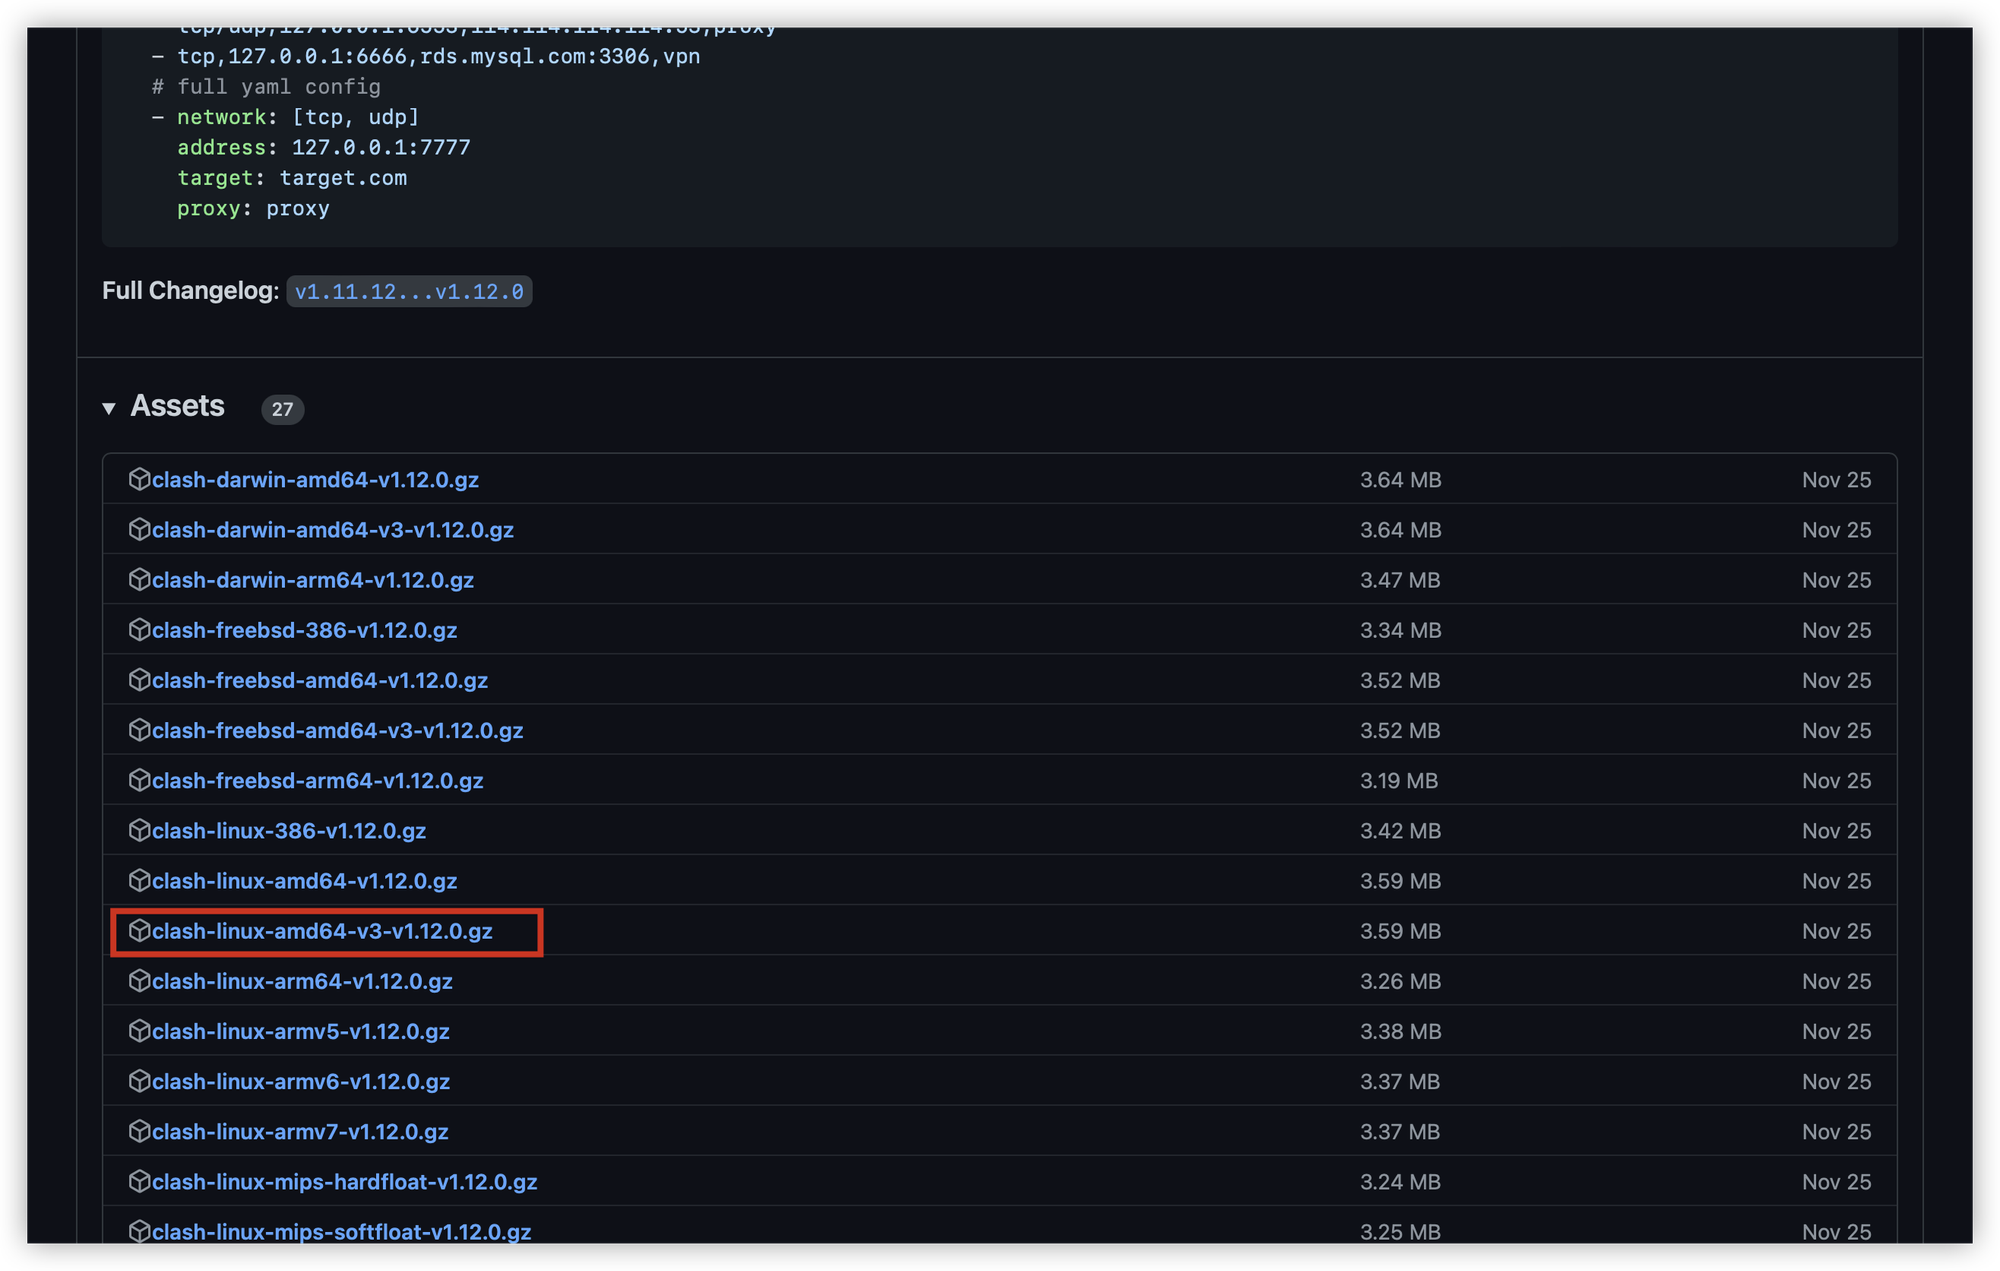
下载后解压,然后将名字改成
clash,然后上传到 openwrt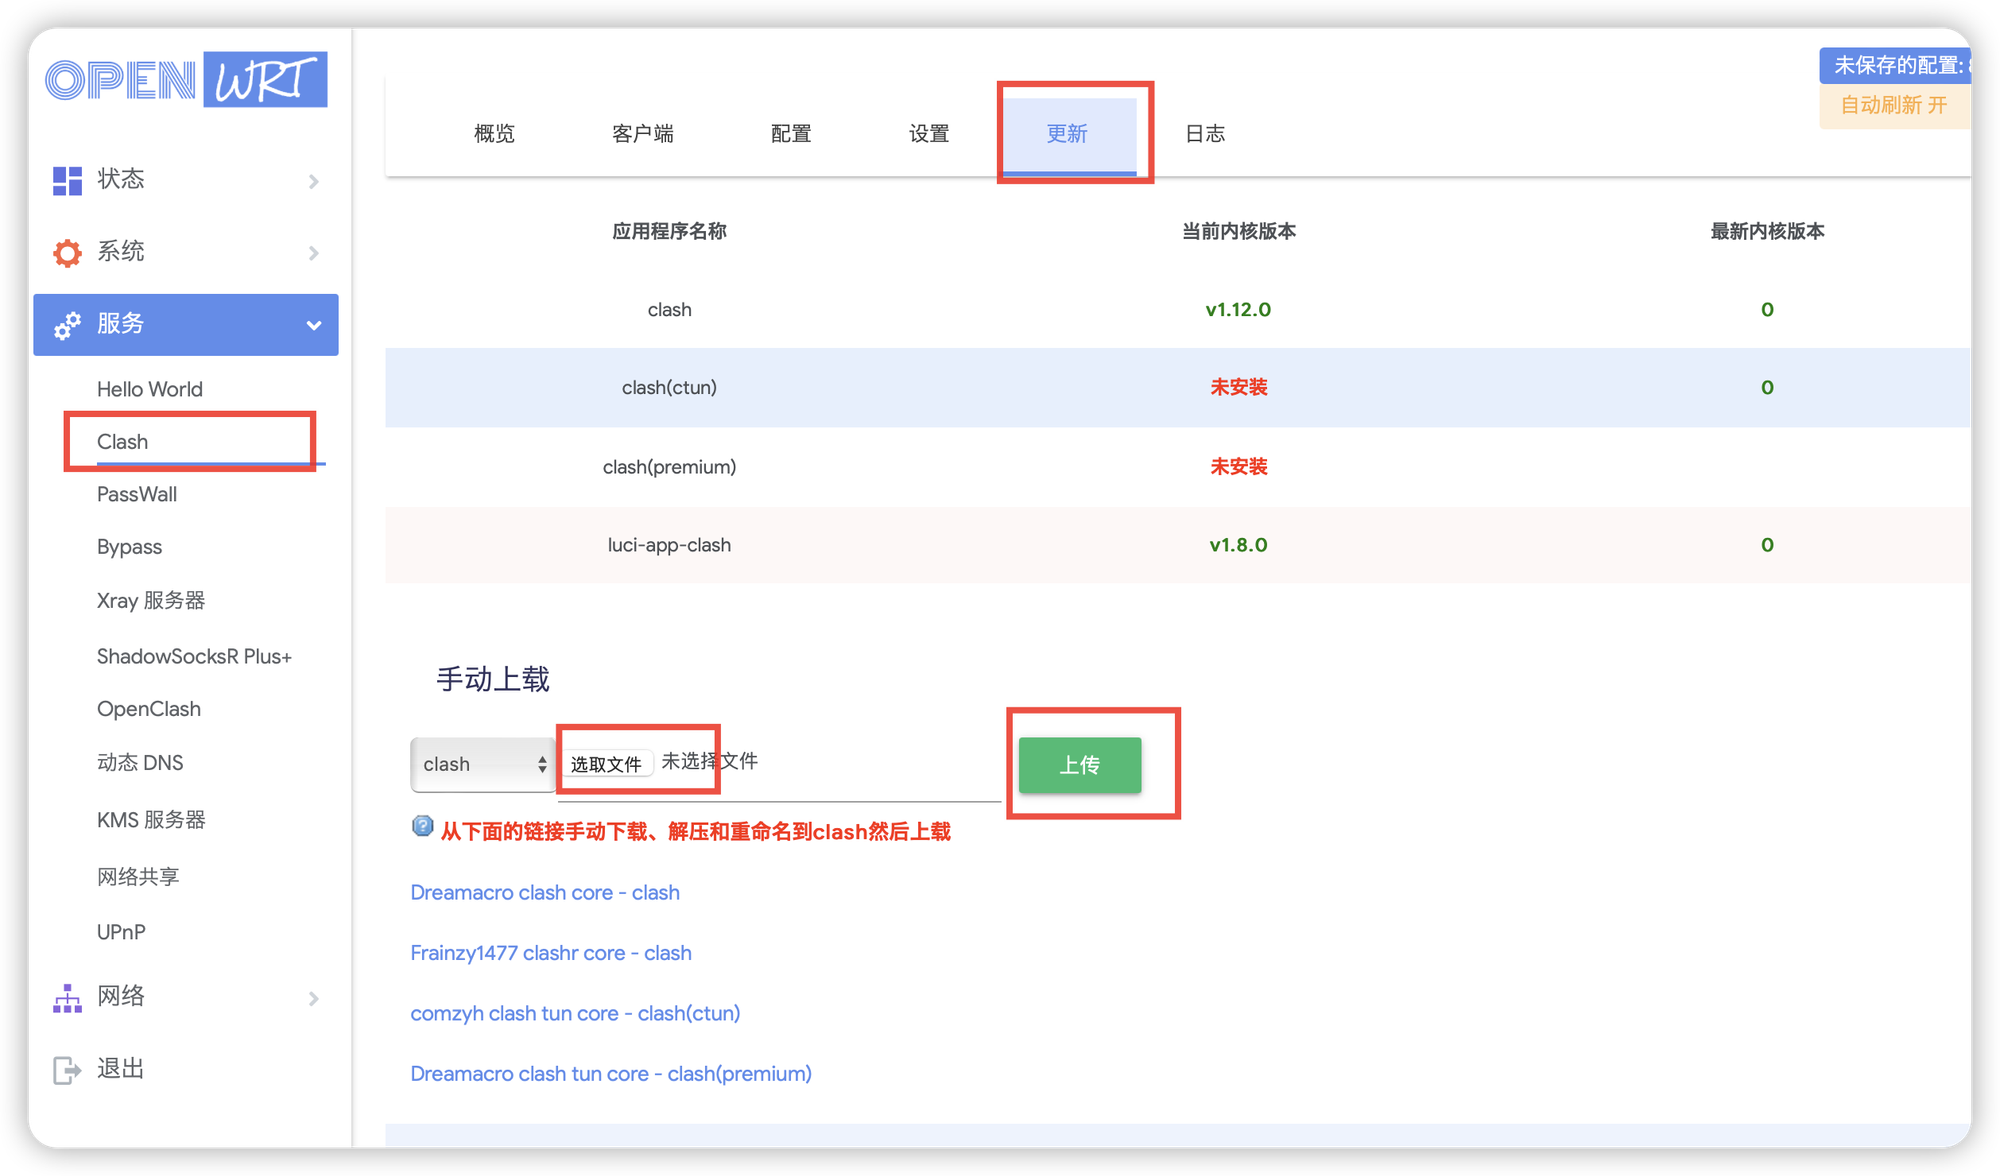
然后拉到下面会提示你安装,你安装就行了
3.4 clash 科学上网
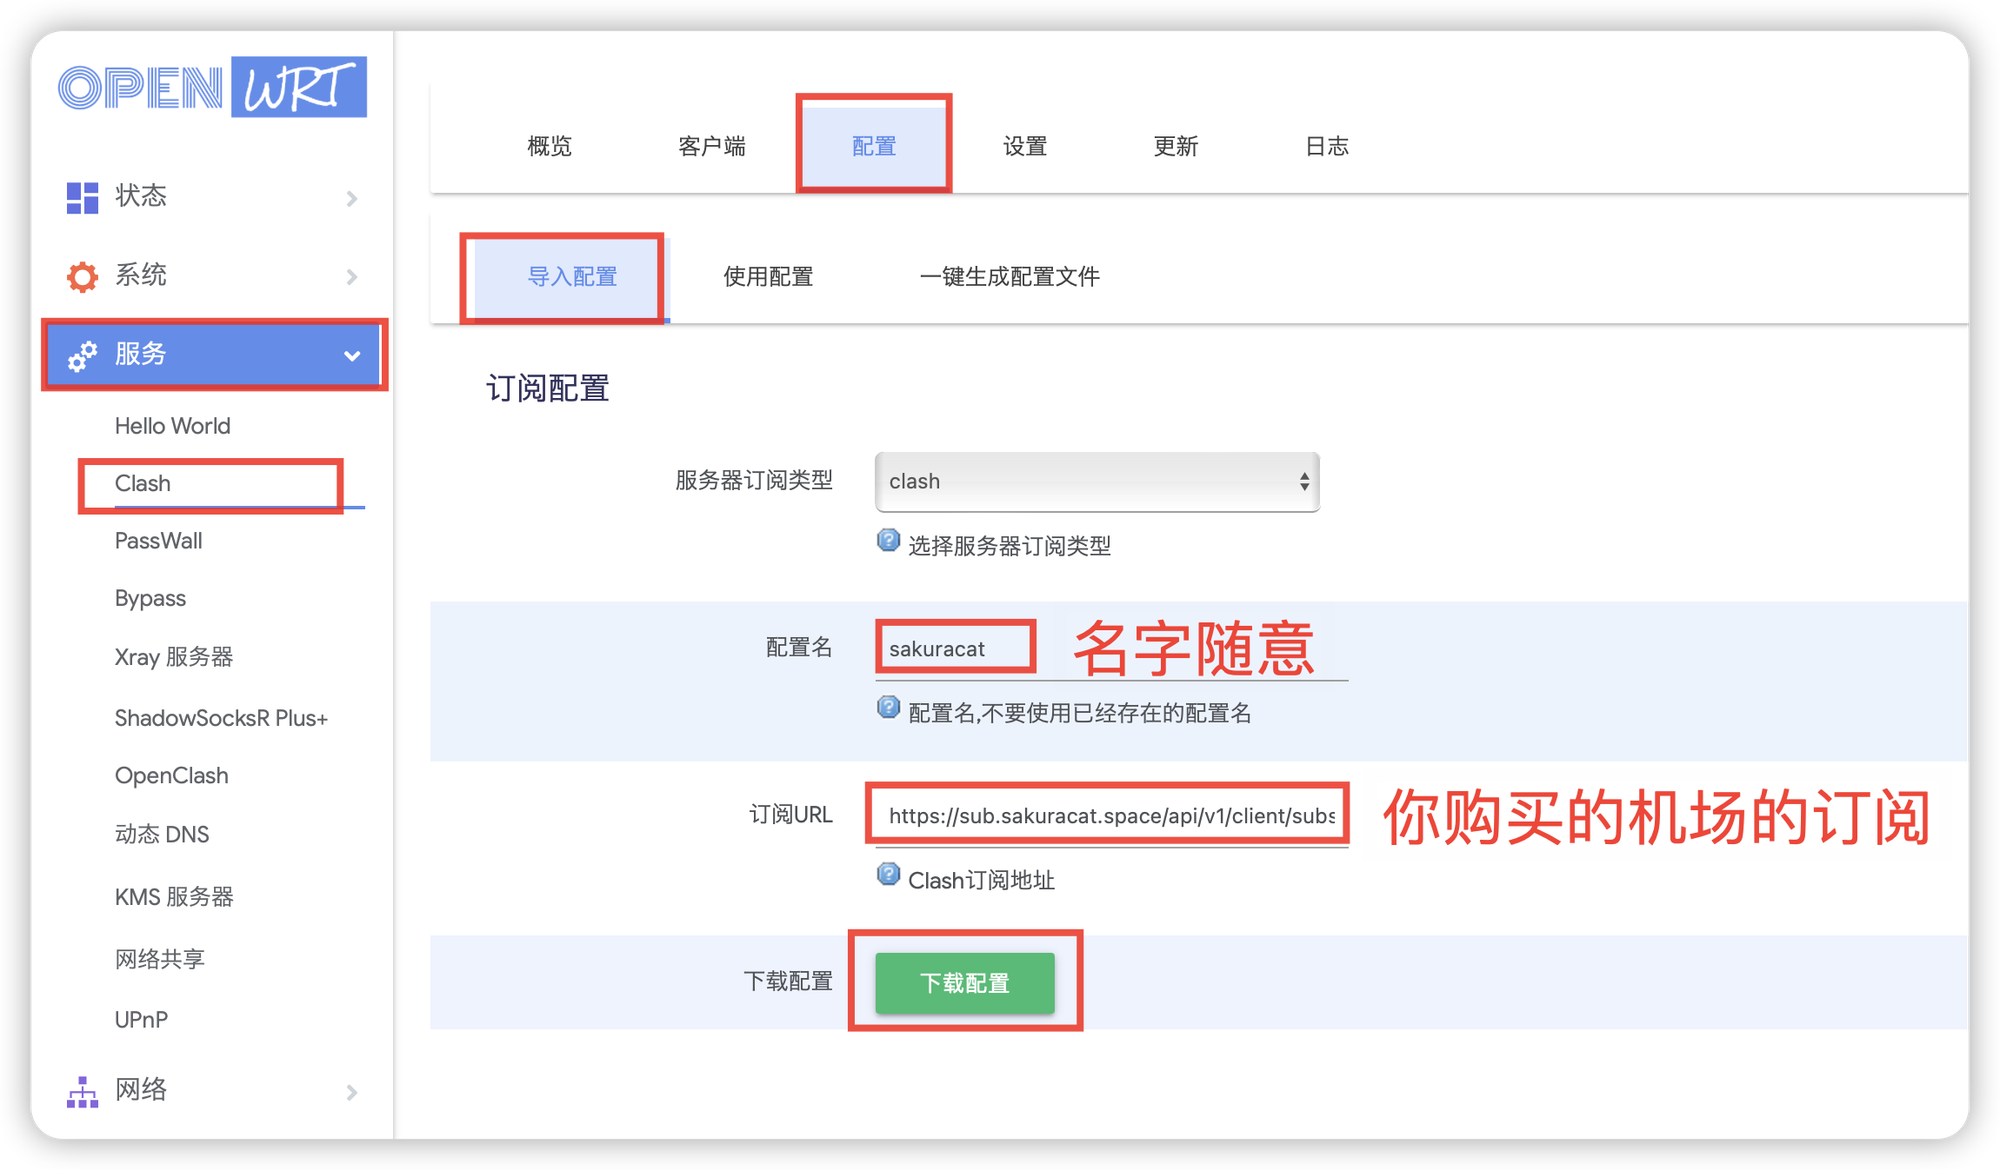
然后更新使用配置就行了
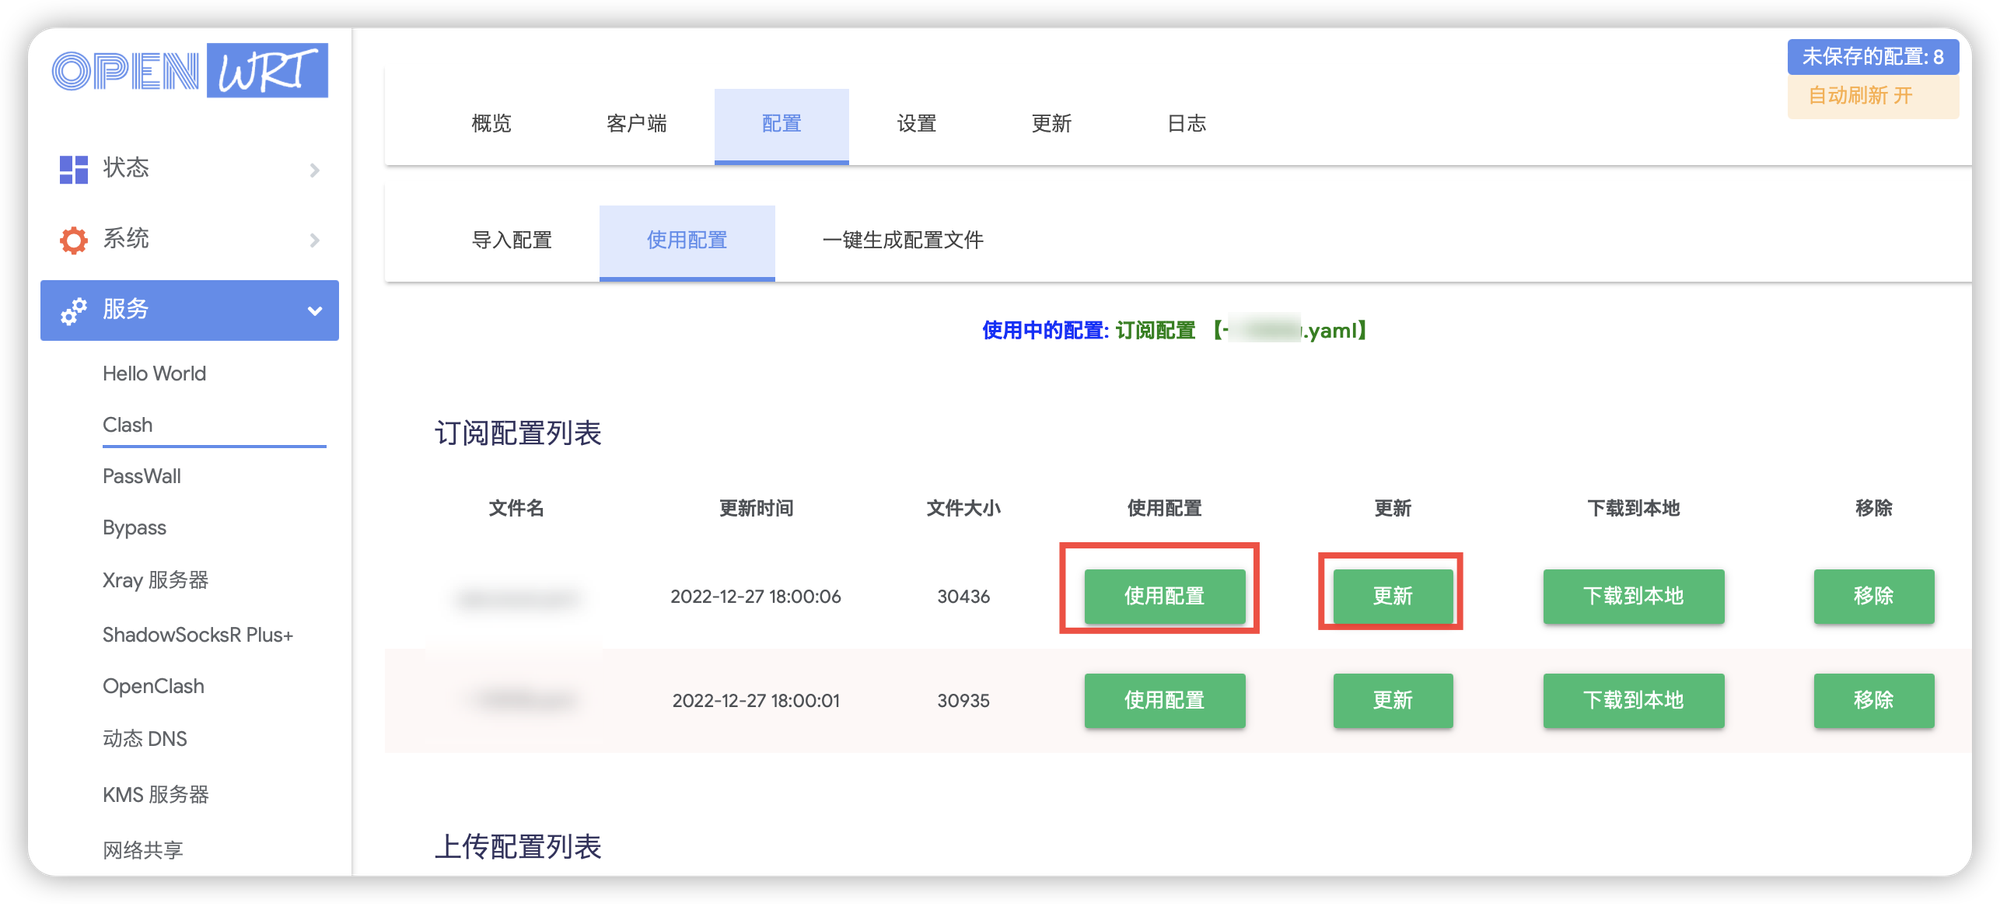
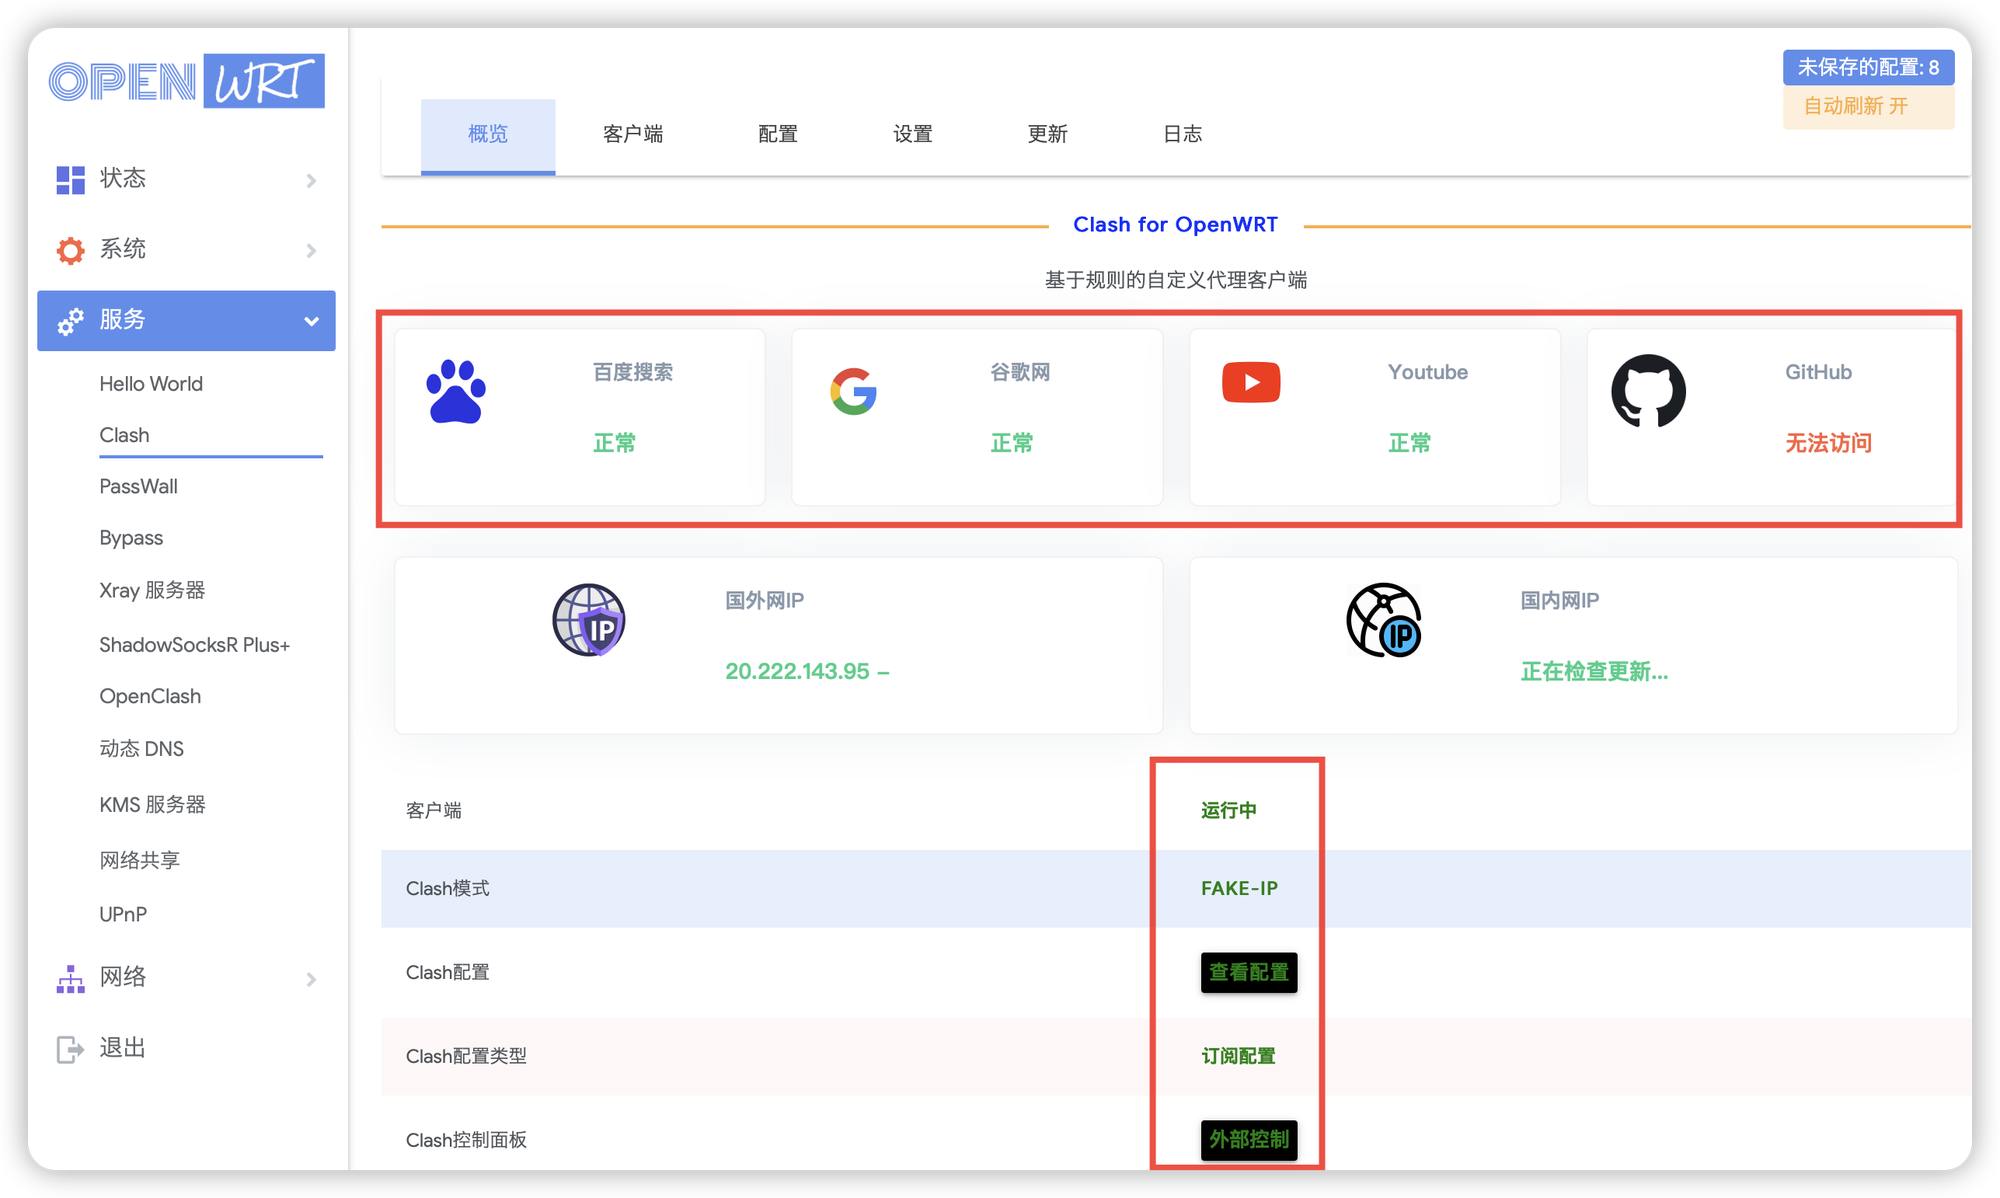
最后启动 clash

最后 clash 会自动帮你检测是否可以科学上网
最后可以设置一下自动更新

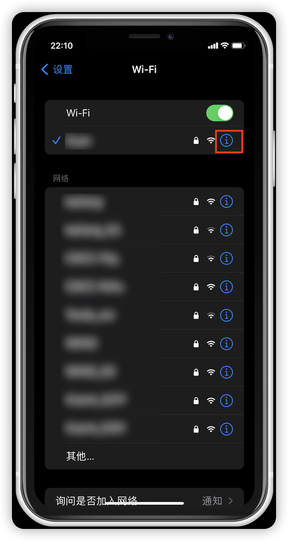
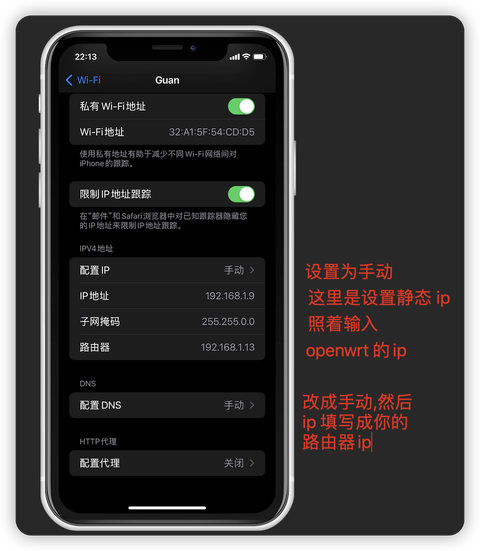
4. 客户端使用
这里拿 iPhone 手机举例子
5. 参考教程
- 作者:我心永恒
- 链接:https://wxyhgk.com/article/nas-synology-openwrt
- 声明:本文采用 CC BY-NC-SA 4.0 许可协议,转载请注明出处。


